• Live Life Inspired. Dream With Possibility! Donna Downey
  • April 2024
    S M T W T F S
     123456
    78910111213
    14151617181920
    21222324252627
    282930  
  • Categories

  • Follow me on Twitter – michaelcsmommyj

  • Top Posts

  • Top Clicks

    • None
  • Top 21 Craft Sites
  • Directory of Crafts Blogs
  • Blog Directory

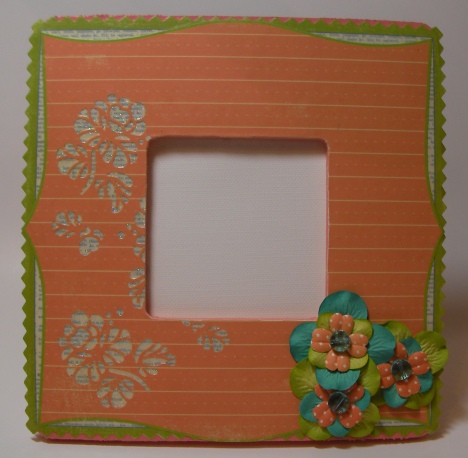
Spring Floral Peekaboo Frame


sany0043_edited

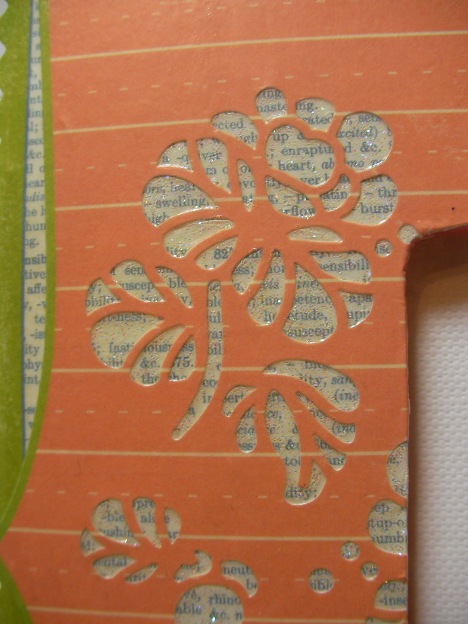
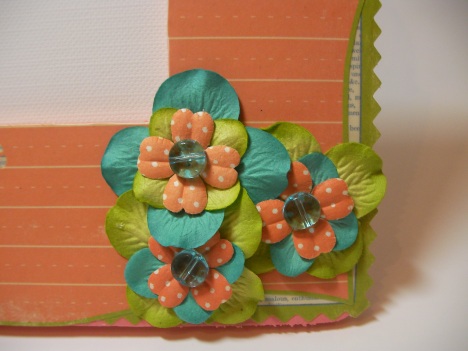
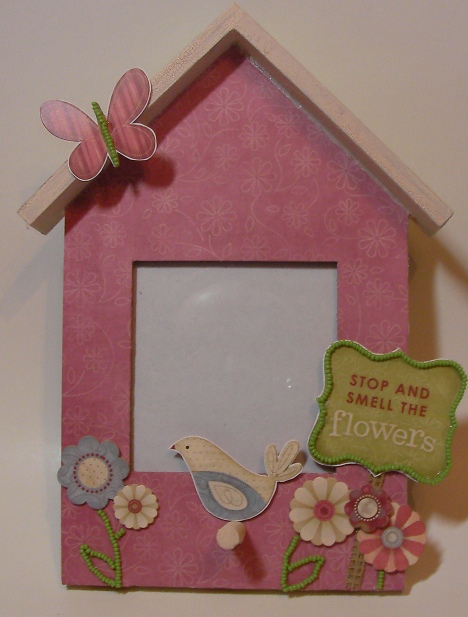
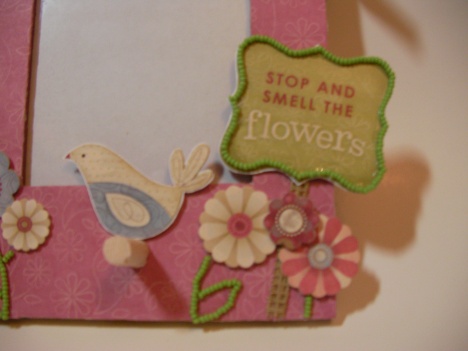
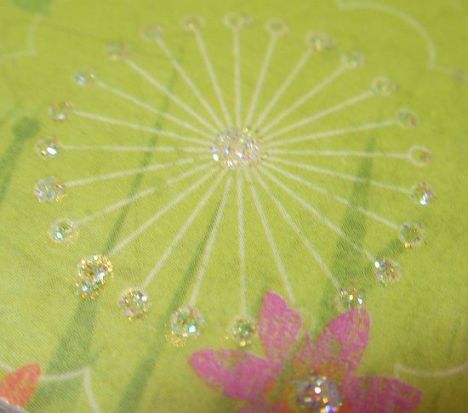
This was a fun little frame that came together really easily using some papers from an 8×8 pack of Making Memories papers.  These $1 frames from Michael’s just happen to be the perfect size to allow you to use an 8×8 in its entirety.  This collection from Making Memories happened to have a lot of diecut papers in it and while flipping through them I found that I really liked the way the text looked behind this floral cutout so I Mod Podged them on as is.  You’ll notice the overhang on the sides (these frames aren’t perfectly square) – adding a couple of additional layers of Mod Podge to the front and back stabilizes those overhangs nicely.  I also added some glittery Scribbles (Duncan) to the flower openings to jazz them up a bit and then layered some Prima flowers for the corner.  The beads I used as the flower centers were from Flair from several years ago, but you can find coin-shaped beads like that in most bead departments of your local craft store.  

sany0045

sany0046

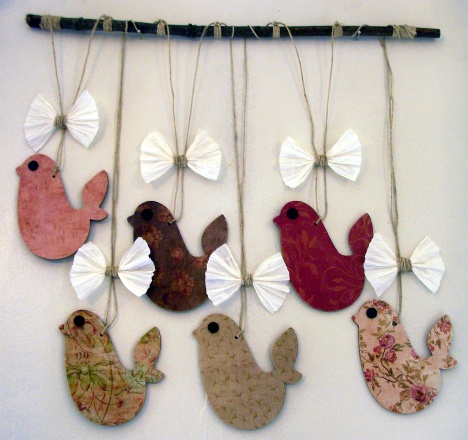
Primitive Bird Wall Hanging

SANY0043_edited

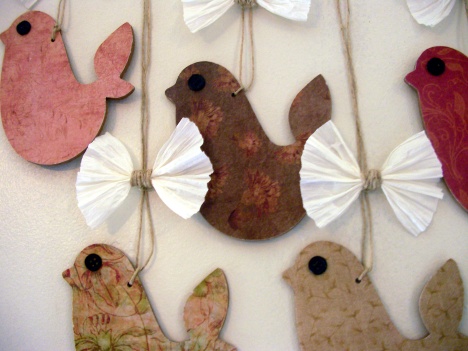
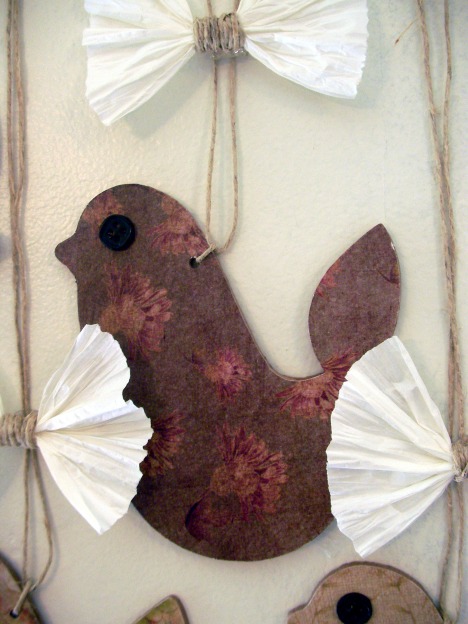
Plaid recently came out with these packages of mdf cutouts in various shapes.  My nearest Michael’s only seems to carry a few of the shapes (which, of course, makes me want the others like crazy – doesn’t it always work that way?) and I picked up a package of these cute little primitive birds to play with.  I used Mod Podge to adhere some Prima papers and then some quick button eyes.  I made the holes to hang them with using a Crop-a-dile.  The bows are simply pieces of old raffia ribbon (I think this particular one was from DMD) scrunched in the middle then wrapped with twine.  I hung everything from a branch from my backyard using the same twine.  

SANY0044_edited

SANY0046_edited

Easter Bonnet

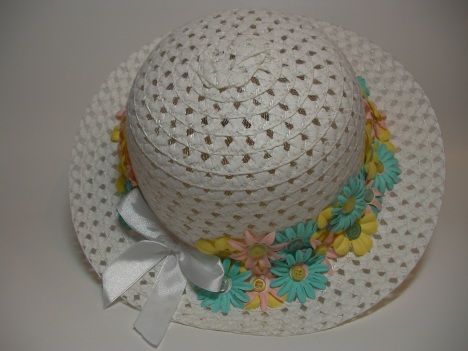
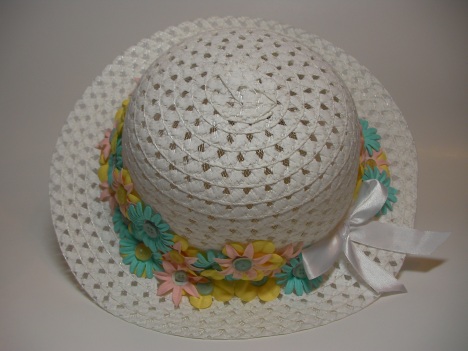
Admit it – how cute are little girls in little flowered Easter bonnets?  I don’t have a little girl, lol, but when I saw these little white hats in the Target $1 spot I couldn’t resist.  And once I started covering it in flowers (American Crafts), I just couldn’t stop!  I glued them on using Helmar’s Premium Craft Glue and added buttons (Making Memories) with the same.  It was really easy – took about one hour while watching TV, lol.  You can’t really see them well, but there are also circles punched from KaiserCraft paper under the buttons as well.  Simple, inexpensive, and although I wished I’d have had a little girl to wear it, this hat looked darling hanging up as an Easter/Spring decorative piece as well.  

sany0032

sany0031


Tissue Box Cover

Well Central Illinois is now officially under water.  Or at least my basement is.  At least it’s going to be a great day to hang out at home and do some creative things!  

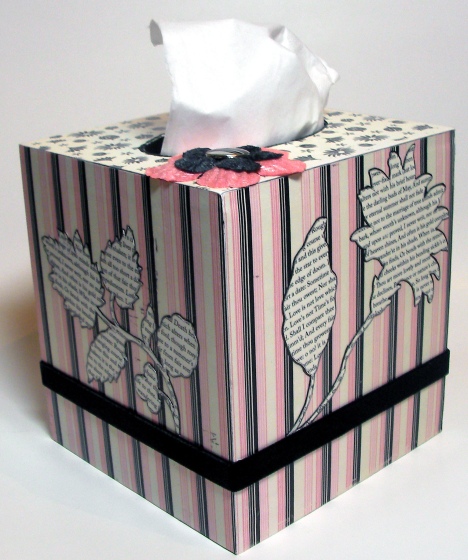
Here’s one of the items I had in the March issue of SNR.  Every month I have an article regarding items that have been altered for a specific room of the house and March happened to be powder rooms.  So along those lines, this is a nice elegantly girly cover for a kleenex box.  Gotta admit.  I love the idea, however I have altered both types of wooden tissue box holders and can’t for the life of me figure out why they would be made to NOT fit any of the tissue boxes on the market.  This one was from Don Mechanic for DecoArt and I have yet to find a box that fits into it.  So you have to take the kleenex OUT of the box then put them in.  

sany0032_edited1

Yea.  Didn’t make sense to me either, lol.  Anyways, I covered it in patterned papers from Making Memories and also handcut the print flowers from a paper from the same Valentine’s Day line.  I always like holiday lines that work well for non-holiday items.  🙂  I used a Staedtler pen to outline the flowers so they would be a bit more defined against the background and added some velvet ribbon (my favorite!) from American Crafts.  

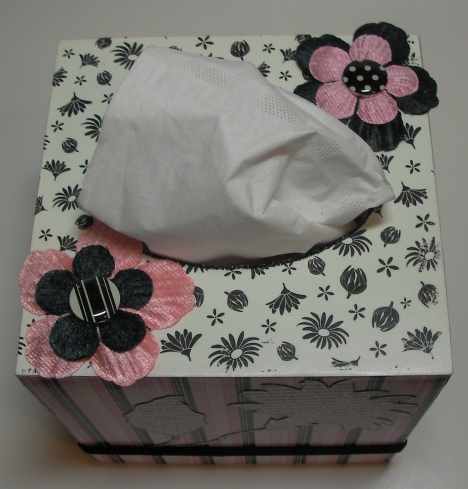
I absolutely LOVE these chenille flowers from Creekbank Creations.  In hindsight, putting them on top of a kleenex box might not have been the most logical thing to do though, since the kleenex lint is drawn to them like a magnet.  The epoxy brads are from Making Memories.  The flowers and ribbon are attached using Helmar 450 Quick Dry Adhesive and the papers, of course, are Mod Podged on.  There’s also a thin line of black stickles around the opening.  

sany0034_edited2

Butterfly Photo Holder

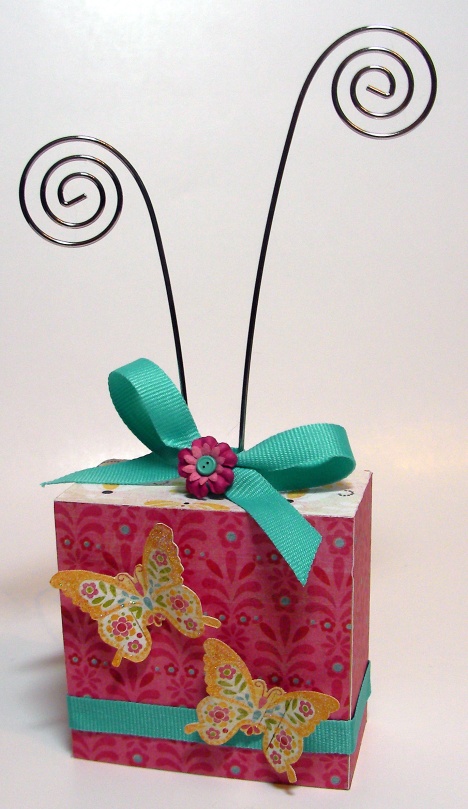
Another Michael’s unfinished wood find – $2 and because it’s basically just a block of wood – SUPER quick to alter!  If you’re looking for a beginner item to get your feet wet on altering, this would be an ideal project.   Simply cut your patterned paper (I used some Basic Grey) to the sizes of the sides and top.  

sany0032_edited

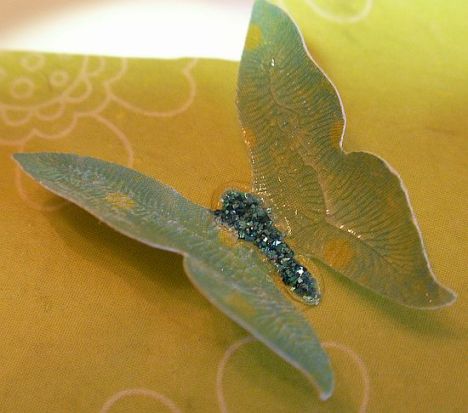
Adhere them using Helmar Professional Acid Free Glue.  Cut out a couple of butterflies from more Basic Grey paper (or whatever embellishments float your boat for your project), do a little bending for dimension and adhere using Helmar ScrapDots for even more dimension.  A little bit of Scribbles action to get things glittery, of course.  A quick bow out of ribbon, a few Prima flowers and a teeny tiny button brad (Making Memories – I just love these!) and it’s done.  Really.  It’s that easy!

Scrapbook News + Review May 2009 Calls

May 2009 Calls

By Style* (see special call below)


Caught Ya! Mischievous

Children’s Artwork

Graduation

Letter to My . . . husband, wife, son, daughter, friend, hero, etc.

Military & Serviceman (police, fire, emergency crews)

Pieces of Me


Call Guidelines

    Please submit your pages with the following guidelines:

  1. Pages only — no altered projects, home decor or mini albums, unless specified
  2. Of any size, i.e. 12″x12″, 8″x8″, 6″x6″
  3. Can be traditional, hybrid or digital (please specify)
  4. Please send image(s) as large as possible and we�ll scale down to size
  5. Please NAME your image with the title of the layout or project
  6. Call name must be specified in subject line
  7. No restrictions on whether it has been posted to an online gallery, blog or other site, but we respectfully request that you take them down when requested for publication.

    Important Note: Please register at our site before sending in your submissions. This will ensure that we’re able to properly contact you as well as authorize you to view the magazine should your artwork be accepted for publication. All submissions must include a SNR username.

Deadline: May 13, 2009

Send submissions to subs@scrapbooknewsandreview.com


Special Call

By Style

    In each issue of Scrapbook News & Review, we’ll feature scrapbook pages by style and skill level. As a chance to see as many styles and genres as possible, for this call only, we will not restrict the amount of submissions per scrapbooker. In fact, we would prefer to see at least 3 to 5 layouts per scrapbooker in order to give us an idea of how well defined your style is.

    We’re currently looking for pages and projects of any size or subject. It must be a clearly defined style, i.e. clean and simple, modern and graphic, shabby chic, classic, freestyle, eclectic, etc. Please include the style category you feel best describes your work.


Mini Album Call

    The above flap album is an example that is just bare bones. Now we’d like to see what you can do with it!

Here is a list of what you’ll need: 

3 pieces of cardstock cut to 6×12 
1 piece of patterned paper or cardstock cut to 6 x 11 
5 pieces of patterned paper approx 5 1/2 x 5 1/2 
8 pieces of patterned paper cut approx 5 1/2 x 2 1/2 
2 pieces of patterned paper or cardstock cut to 6 x 1/2″ 
2 pieces of ribbon approx. 18″ 
4 eyelets 

Score the cardstock at 3″ and 9″. Fold and use a bone folder to flatten the folds. 

Glue the 3″ flaps together so all 3 pieces of cardstock are attached to each other. 

Adhere patterned paper to the book. 

Punch holes in the 6 x 1/2″ piece of cardstock/paper about 1/2″ in apart in the middle of the paper. Thread your ribbon through the holes. Adhere these papers to the ends of the 6×11 paper. This is the part that wraps around the closed book. 

Close up the book and lay it face down. Line up the center of that 6×11 piece of paper with the center of the back of the book and adhere. Then wrap the corners around the front of the book and use your bone folder to flatten the folds. Don’t adhere the flaps.


Stay tuned – I’ll be posting the calls for the altered/home decor section later this evening.


Playing Catch Up

Wow.  There are tumbleweeds over here rolling across my blogland home, lol!  I have so much to catch up on I don’t even know where to begin!  My days have been busy, busy, busy lately and although blogging has been on my “to do” list for the past month, it just always seems to get skipped.  I blame Facebook.  You can come find me there if you want to make sure I’m not dead if I disappear like this again!  

So anyways.  Let’s see.  Let’s start with Scrapbook News + Review.   That would be where a lot of my time and energy is going these days and if you haven’t come by yet, trust me, you will want to!  We have got some truly amazing things that will be unveiled in the coming months, from HUGE new features in the magazine to some spectacular events planned.  I really don’t know how to even begin telling you how exciting this all is – NO other magazine, print or online, has the kind of content we have in the works right now.  Everything from our new kit club section that unveiled in the April issue to the fabulous new sections coming up, videos, TONS of techniques, big projects with manufacturers…we got it all, baby!  And don’t be shy – the staff has all been crazy busy behind the scenes getting all the new stuff figured out, but we’d LOVE to have you stop by the forum and chat with us!  We’re ALWAYS up for making some time to talk to other paper crafting enthusiasts – it’s why we DO what we do, lol!  

Speaking of SNR, I’ve still got all my March projects to share with you (eek – and a few left over from February – do you really still want to see Valentine’s Day though?).  I’ll get to those next so you should start seeing those all pop up and wake my poor little blog up.  😉

Next.  Helmar – wow, I’ve been creating up a storm with some fun new things they sent us and all of our fabulous new preferred manufacturer partners.  I’ll start getting some of that up as well!  For starters, this project went up today on the Helmar USA DT blog.  Go check it out for all the details on what I used and how!  

sany0036_edited

sany0037

My apologies!

Oops!  When I left for Florida I had set a few posts up so I’d have the pictures off my computer and MEANT to do the talking while I was on vacation but never got back to it!  I promise I’ll get back in there and give you all the details on those projects here in the next day or so!  In the meantime, THIS is where I’ve been for the past 8 days and why you haven’t heard from me…

sany0015

sany0186

sany0241

So I will have around 1000 photos by the time it’s all said and done and I have everything loaded…I’m even in the mood to scrapbook now, lol!  Plan on seeing lots of mini albums, items altered with the gazillion shells I picked up, etc. in the coming months!  🙂  Posts with words – I promise!

Bittersweet Storage House

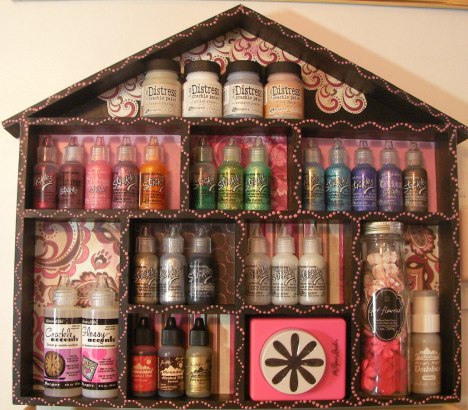
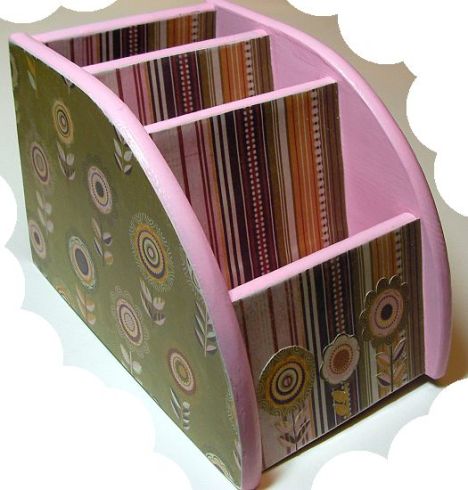
This piece was one I featured in an article in the February issue of Scrapbook News + Review on altered items for your craft room/studio.  I gave up on buying pre-made storage for my craft supplies ages ago.  I’ve found that by thinking outside the box I can come up with something custom-fit for just about any supply PLUS I get to alter it – woohoo!  I pretty much stalk the unfinished wood section of Michael’s.  Hobby Lobby is my other option, but I’ve found I don’t like their selection quite as well (or their quality – always check each piece before purchasing!) and they don’t change out their stock as often as Michael’s does.  When I came across this house shadow box (I think it was $5), my mind just raced with all the possibilities for what might fit into those cute little sections!  

sany0058_edited

I’ve pictured here a variety of things that fit into the sections, but I actually use it solely for my Stickles and Glossy/Crackle Accents.  I like having those out and handy plus being able to see the Stickles colors at a glance.

sany0055

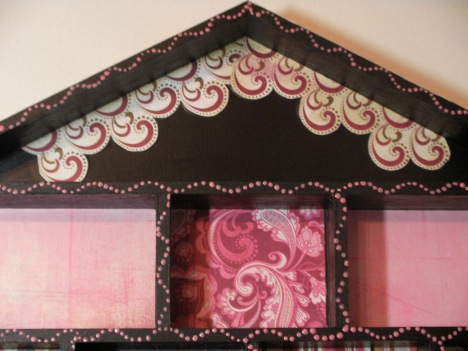
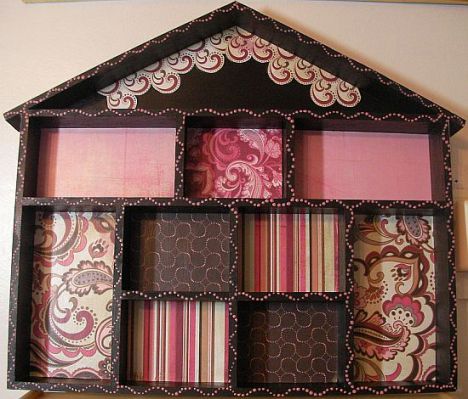
First I painted the whole thing with black acrylic paint (Jo Sonja’s by Chroma – it’s a nice, thick paint in a tube.  Step above craft grade, step below artist grade).  Then I started playing with the papers from the Bittersweet line from Basic Grey and just filling in all the spaces.  Paper packs are awesome for projects like this where you want a variety of papers – they’re all pre-coordinated!  I used an Xacto knife to cut out a few strips from one of the papers to decorate the “attic” area.  Then I just started dotting away with Scribbles (Duncan) in a shiny pink to make the edges more interesting.  Even with drying time on the Mod Podge and paint, I think the whole project only took me a couple of hours.  

feb-09-altered-artful-rooms-jenna-franklin-8-storage-house-empty

So next time you’re out at your local craft store, wander through the unfinished wood section and think outside the box!  Take a piece over to the scrapbook section to see what might fit – you might be surprised!!!

Flowered Tier Storage

feb-09-altered-artful-rooms-jenna-franklin-flowered-tier-storage

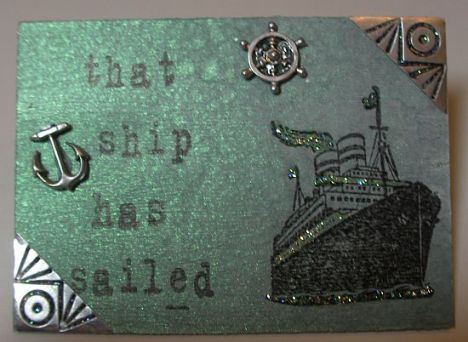
ATC – That Ship Has Sailed

feb-09-altered-atc-jenna-franklin-ship-has-sailed

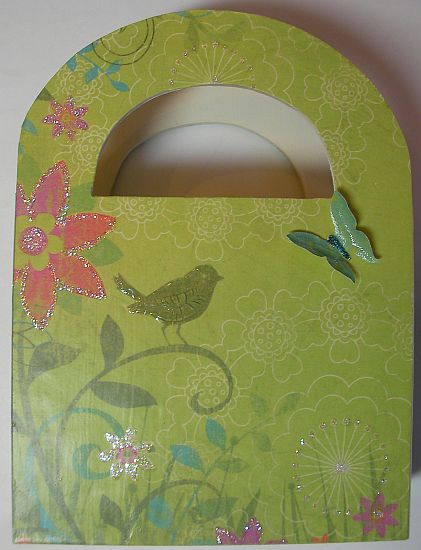
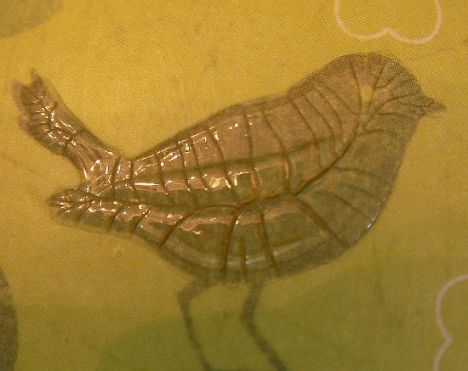
Spring Wooden Gift Basket

feb-09-altered-seasonal-jenna-franklin-8-spring-wooden-gift-basket

feb-09-altered-seasonal-jenna-franklin-8-spring-wooden-gift-basket-2

feb-09-altered-seasonal-jenna-franklin-8-spring-wooden-gift-basket-3

feb-09-altered-seasonal-jenna-franklin-8-spring-wooden-gift-basket-4

Blue Green Necklace

sany0033_edited

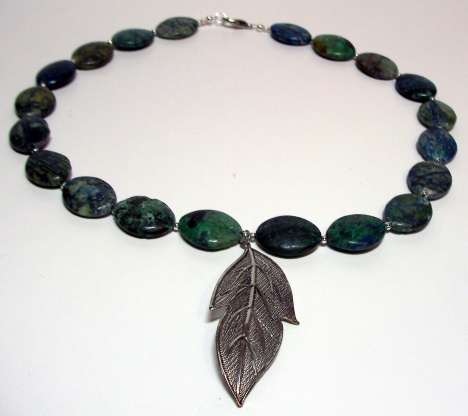
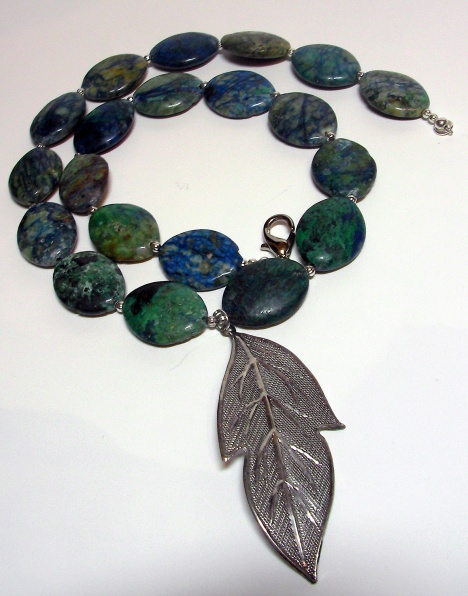
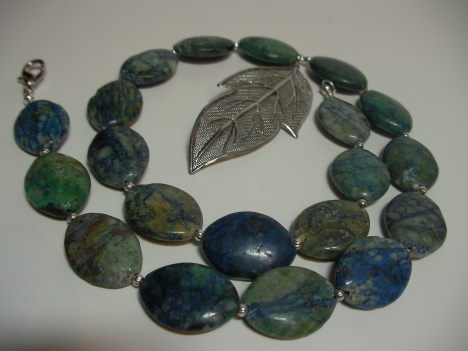
Yeah, so naming pieces is so out of my reach, lol!  I know, I know – this one definitely needs a more original name – I’ll get to it later, lol!  Another piece created solely to showcase these beautiful Chinese Chrysocolla beads (15x20mm horse eye shape) I got from Auntie’s Beads.  I just love all the variation in color!  When I first got the in I was a bit disappointed in the lack of an attempt to have the strand a little better matched, but have to admit that I love it’s imperfection as well.  It’s interesting (albeit a bit uncomfortable for a self-conscious person, lol) to note that when I wear it, people tend to take a moment and follow the line around my neck with their eyes to take in the different designs within the beads.  I strung them with tiny silver spacers from Fire Mountain Gems and a pendant from Blue Moon Beads.  The pendant wasn’t what I had planned on using, but my original piece just hadn’t been large enough to pull some focus to the front and got almost “lost” among the stone beads.  

sany0034_edited

sany0035

Spring Fling Crop at Scrapbook News + Review

snr-spring-fling-crop-09

There are buds on the trees and the birds are singing. We see flowers, and the weather is warming up. Whether Spring has made it to your area, or you only wish it had- Scrapbook News and Review has the perfect Springtime Celebration. Come celebrate Spring with us at the SNR Spring Fling Crop, Sat, March 21st. From 12-6 pm CST, we will have games, challenges, mini classes and loads of Scrapping inspiration in the forums. This is a grand afternoon of fun, planned for everyone’s enjoyment. Are you are scrapper or a card maker? Traditional, digital or hybrid? Do you love paper? So do we- and we have something for everybody! The fun will start with at noon CST, with a handful of Spring themes and inspired Challenges. These will be open for any form of project: scrapbook, cards, altered or digital. The fun continues with mini classes on a variety of topics and techniques, held hourly, all afternoon. Our talented staff and contributers have outdone themselves with these classes- and you are going to love it! As if all that wasn’t enough, just when you are ready for a break- we’ll be there for that too. The forum will be filled with fun topics, games and conversation to keep the party hopping. Makes plans to join us this Saturday, 12pm CST, on the SNR Forums. It is going to be a great day of Springtime Fun!

Scrapbook News + Review April 2009 Calls

Scrapbook News and Review is looking for your altered and home décor creations.
The Details:
-Must include complete supply list
– Please send each item in a separate email unless they are part of a set
–Photo preferred to be 650 pixels on longest side, 72dpi.
-Please include contact information
– Projects may be previously seen. If chosen, we respectfully request they be removed from any blogs or galleries. An ‘Out for Publication’ sign will be provided upon request.

Send submissions to: jfranklin@scrapbooknewsandreview.com
This e-mail address is being protected from spam bots, you need JavaScript enabled to view it
<!–
document.write( ‘</’ );
document.write( ‘span>’ );
//–>

April 2009 Calls
Artful Rooms: Items that can be altered for use on a porch or patio.
Options: Birdhouses! All sizes, colors and styles – tweet tweet!
Seasonal: Mother’s Day decor and gifts for Mom
Wearables: Jewelry, totes, and other wearable items created using scrapbook/stamping supplies
ATC Alley: Designer’s choice – let’s see your latest and greatest Artist Trading Cards!

DEADLINE – March 25th!

Specifics for scrapbooking, mini album, stamping, card calls and more can be found here.

Beautiful Life Wall Hanging

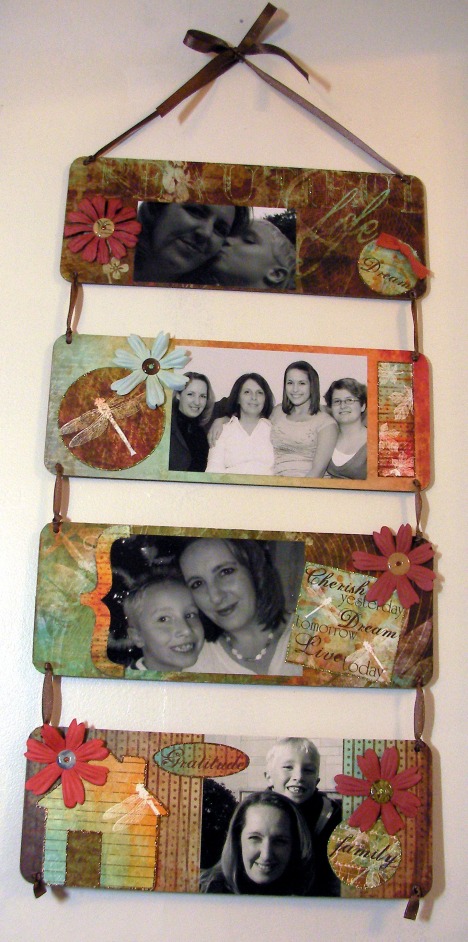
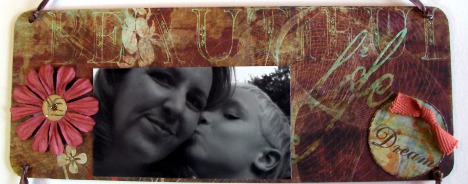
This was a project I made for Helmar that went to CHA to go in the booth.  I miss it!  This paper line from Bo Bunny really looked great in my living room – going to have to hunt down some more and make a new one, lol!  For the base of the wall hanging, I used chipboard pieces from Creekbank Creations.  I think I’ve mentioned their chipboard before as I use it especially on jewelry.  It’s much denser than anything else on the market so it’s super strong and will hold up to any kind of application – paint, Mod Podge, inks, etc. without any warping.  They are local for me, so I can get my hands on their products easily but it’s not as readily available elsewhere so if you’d like to try it, you’d probably need to check their online store or see them at an event.  They have a whole second “store” that travels to all the CK conventions and lots of other events.  So if you’re at one of those, stop by and try this chipboard – they have lots of mini books and shapes and pages of cutouts plus will do custom word books.

Anyways, back to the project.  Again, I relied mainly on the paper and a page of cutouts that goes with the Beautiful Life line and just accented with lots of Stickles.  Some Prima flowers and epoxy washers from EK (Rebecca Sower’s Attic line) and a piece of ribbon from American Crafts and lots of Helmar adhesives to put it all together!  The little wooden house shape was a craft store find – they came in a package of four for $1, I think.

sany0001_edited

sany0005_edited2

sany0006_edited1

sany0007_edited1

sany0008_edited

Heart Canvas Frame

Oops!  Still trying to get all these Valentine’s projects posted before the end of February.  😉

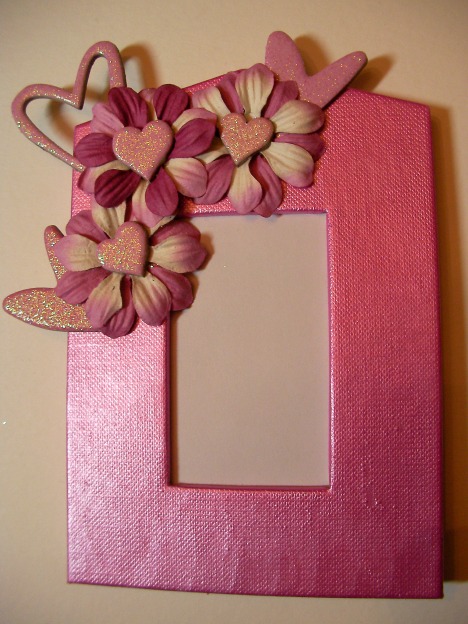
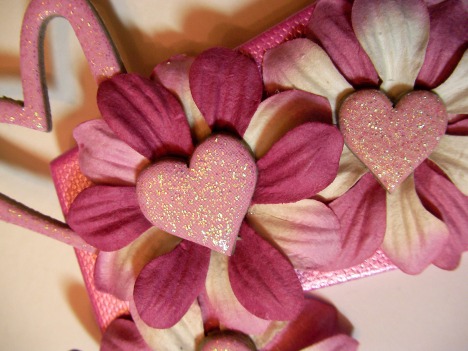
This little canvas frame took NO time at all.  You could literally make this in a half hour and give it for a gift a couple hours later (just to be sure the paint and glue were totally dry, lol).  The frame is one that EK used to sell – not sure if they still do or not?  Being canvas, it takes paint like a dream and I used Jacquard Lumiere paint to cover it in pink.  The rest is simply adding a few Prima flowers and some pre-glittered chipboard shapes from Scrapworks.  I used Helmar’s 450 Quick Dry Adhesive so it dried fast and strong.  Done!  Change up the colors and theme and you can have instant gifts for family, friends, relatives, teachers…

sany0009_edited

sany0010_edited

Random Pendants

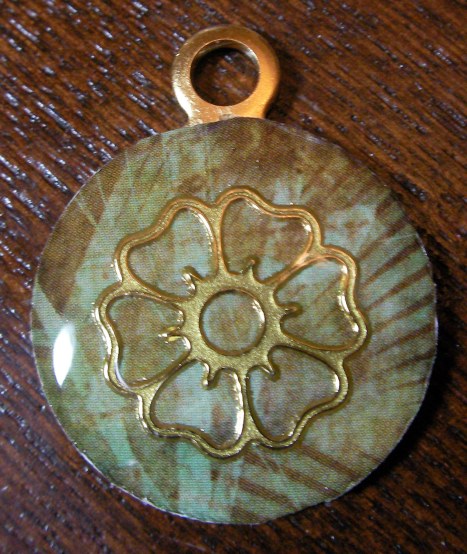
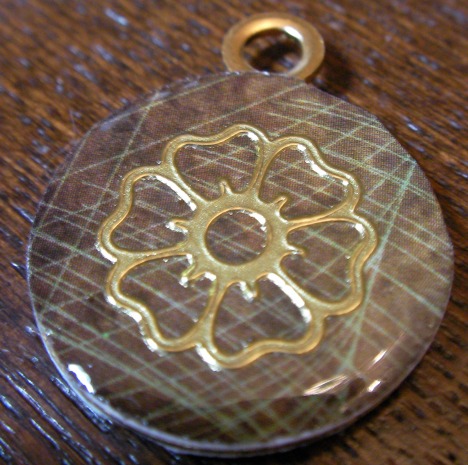
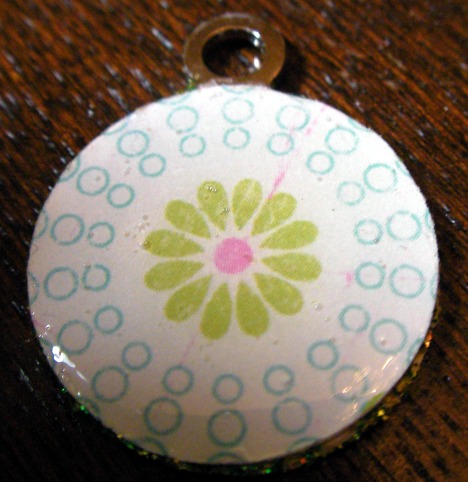
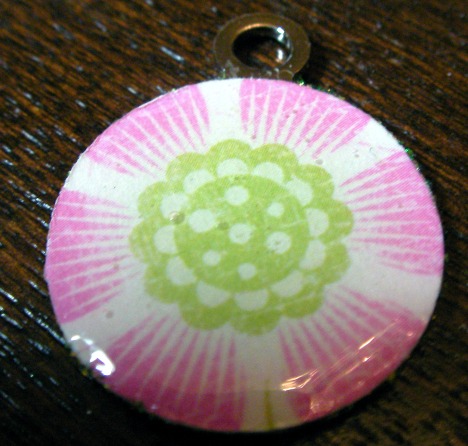
Just a couple of quick pendants I made using old Magic Scraps metal tags covered with tiny scraps of paper and covered in Glossy Accents.  Added outline stickers to the one and Stickles to the edges of the other.  Haven’t figured out what I’m going to do with them yet, was just testing the suitability of the metal tags as a base material.

sany0007_edited

sany0010_edited1

sany0012_edited

sany0013_edited

Jasmine Dragon Phoenix Pearls

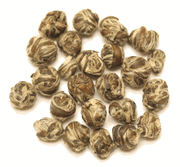
That would be these.

jasmine-dragon-pearls

My friend Kary and I went out for coffee yesterday morning and the coffee shop had these in a glass on the counter.  So here I am, ordering my frozen blended coffee concoction and eyeing these.  Pretty, aren’t they?  Well, of course Kary notices me looking at them.  And being the good friend that she is, SHE knows just WHY I’m looking at them.  And laughs at me.  😉  Now don’t get me wrong – I LOVE tea.  More of a coffee person these days,  but love the occasional cup of tea.  Especially a good tea.  But of course, I wasn’t originally thinking of drinking these, lol.

Did some research on these and here’s what I found:

Tea enriched with the fragrance of jasmine flowers has been a favorite since the Sung Dynasty ruled China 800 years ago. The jasmine plant was brought to China from Persia before the third century. These intoxicatingly fragrant flowers first made their appearance in tea around the fifth century.

Dragon Phoenix Pearl gets its name from the tea bushes “climbing the hillsides like a Dragon rising from the waters”. It is grown in a mountainous, often fog shrouded area near the border of the Fujian and Jiangxi provinces. Dragon Phoenix Pearl is one of the finest jasmines shipped from the port of Foochow.

The tea is plucked in April and May and stored until August when the finest jasmine blossoms are in bloom. Night blooming white jasmine flowers are picked in the morning when the tiny petals are tightly closed and kept cool until nightfall. In the early evening the flowers begin to open with a popping sound which is the signal for the scenting to begin.

Once open, the “mating” of the jasmine and tea leaves takes place in several applications, each taking up to four hours, after which the jasmine petals are removed. Once the petals are removed each leaf and bud set are skillfully hand rolled into a tiny pearl size ball. The tea is then wrapped in silk mesh and dried to set the form.

During infusion the boiling water causes the tiny pearls to open like flowers and then sink slowly to the bottom of the cup. We recommend placing 18 to 20 of these tiny pearls in a clear glass cup to watch their graceful unfurling. The superb fresh bouquet, delicate flavor and unique leaf shape make this tea extra special.

Let me tell you – these smell AMAZING.  So I bought some.  Kary followed me home to watch (she knew) and the minute I got in the door I tried to poke a hole in one with a needle tool.  I tried stabilizing them with Future Floor Finish first (just turned their pretty colors to a dark, shiny brown).  I tried wetting them down first.  Unfortunately, there just is not a way to string these.

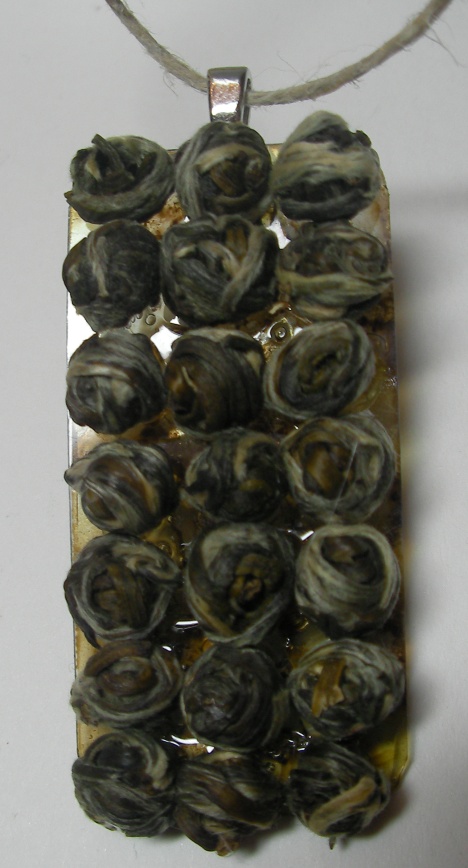
So with Kary giggling and offering helpful suggestions along the way (I am soooo converting her to a crafty girl!), I began testing other options.  I cut a small piece of acrylic and began gluing the pearls onto it using Helmar’s 450 Quick Dry Adhesive.  Kary suggested it might look better if I added some color to the acrylic so I pulled out some alcohol inks and dabbed the back, then added a silver bail and popped it onto a hemp cord.  I actually braided some of the cord but forgot to string it before tying off the knots and didn’t feel like re-doing it for the photo, lol.  But anyways.  Here’s my tea pendant.

sany0030_edited

And yes – it tastes every bit as heavenly as it smells!


Adore Candle Holder

This was a fun project!  Ever made your own “glass glitter”?  Great for working out frustrations, lol!

After Christmas I purchased some clearance gold ball ornaments.  The super cheap kind that I think ended up costing about $.75 for a package of 24 mini’s (about 1.5″ diameter, I think).  To set up for this, I took an old wooden kitchen cutting board (this is going to mangle it, so don’t use your good one!)  You could also use just a sheet of scrap wood.  Grab some protective eyewear as well!

I put a few baubles at a time (remove the metal hanger part) into a ziploc baggie (you’ll go through several of these as well) and just started pounding on it with a hammer to break them up.  Every so often, add more baubles and as the baggie gets too beat up to be sure you’re containing all the tiny shards, switch to a new one.  Keep hammering until the shards are a size to your liking (you’ll have a mixture ranging from the shards down to dust all mixed together).  I store mine in an old Prima bottle and it’s so pretty!

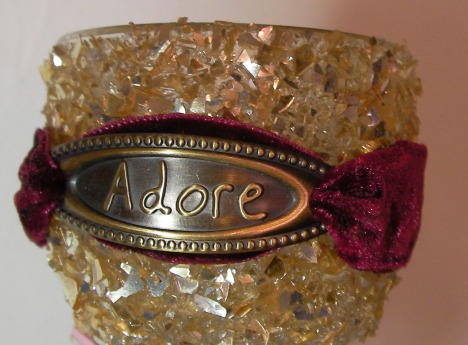
Now, for the candle holder itself, I grabbed a little votive holder from the dollar store (you can get these cheap ones just about anywhere from your local craft store to dollar stores to department stores).  I used Helmar’s Professional Acid Free Glue – which is a white glue that sets clear.  Holding the candle holder from the inside, SMOTHER the outside in this glue.  You want a thick coating that isn’t running down the glass though.  Then just start adding the glitter, pressing it in and working with it to be sure it’s not “melting” down the side.  At this point, it honestly looks like crud.  The white glue WILL take a few days to completely dry to clear because it’s on so thick and being covered with the glitter doesn’t allow air to get to it quickly.  Patience!  I set mine on its bottom, then a few hours later smooshed things back into place that had run a bit and flipped it over.  Repeat this until it’s no longer sliding around on the glass and then just wait for it to finish drying to clear (you can see this by looking through the inside).

sany0006_edited2

To finish it off, I found this velvet ribbon with slider from EK (an older line – can’t remember if it was that family line or the Rebecca Sower line).  It was originally self-adhesive, but of course I used some more of the Helmar to be sure it was going to stick to this bumpy surface.  I also pre-bent the curve into the slider before attaching it.  That’s it!

This looks awesome with a light in it.  I use those little battery operated tealight candles in anything I’m not sure I can wash out if candle wax drips.  It looks even better in a little grouping of candles with the light from the other candles flickering off of this one!