• Live Life Inspired. Dream With Possibility! Donna Downey
  • May 2024
    S M T W T F S
     1234
    567891011
    12131415161718
    19202122232425
    262728293031  
  • Categories

  • Follow me on Twitter – michaelcsmommyj

  • Top Posts

  • Top Clicks

    • None
  • Top 21 Craft Sites
  • Directory of Crafts Blogs
  • Blog Directory

Spring Floral Peekaboo Frame


sany0043_edited

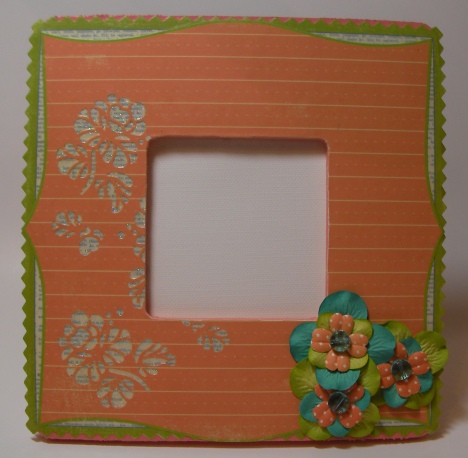
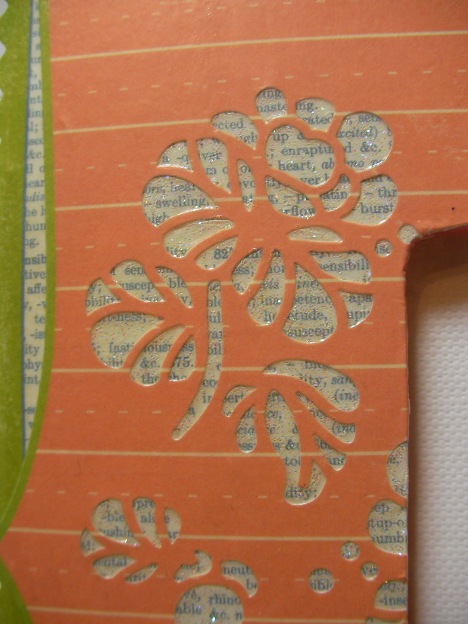
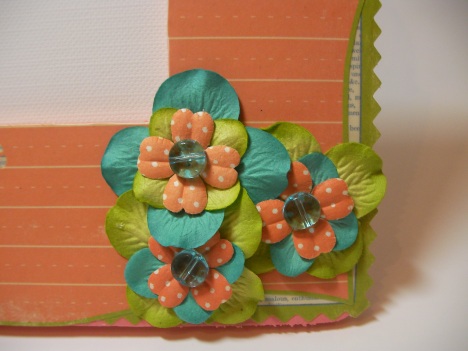
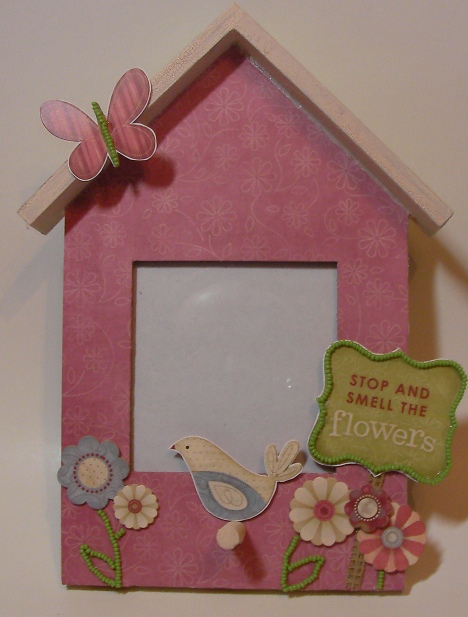
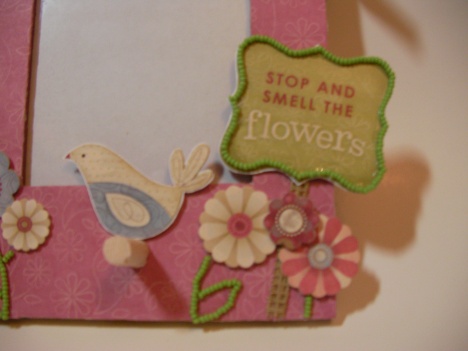
This was a fun little frame that came together really easily using some papers from an 8×8 pack of Making Memories papers.  These $1 frames from Michael’s just happen to be the perfect size to allow you to use an 8×8 in its entirety.  This collection from Making Memories happened to have a lot of diecut papers in it and while flipping through them I found that I really liked the way the text looked behind this floral cutout so I Mod Podged them on as is.  You’ll notice the overhang on the sides (these frames aren’t perfectly square) – adding a couple of additional layers of Mod Podge to the front and back stabilizes those overhangs nicely.  I also added some glittery Scribbles (Duncan) to the flower openings to jazz them up a bit and then layered some Prima flowers for the corner.  The beads I used as the flower centers were from Flair from several years ago, but you can find coin-shaped beads like that in most bead departments of your local craft store.  

sany0045

sany0046

Tissue Box Cover

Well Central Illinois is now officially under water.  Or at least my basement is.  At least it’s going to be a great day to hang out at home and do some creative things!  

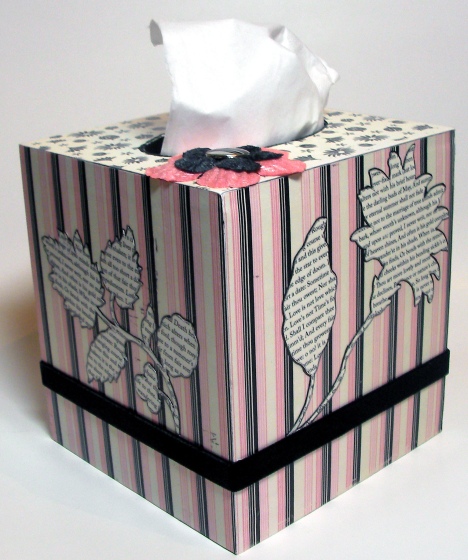
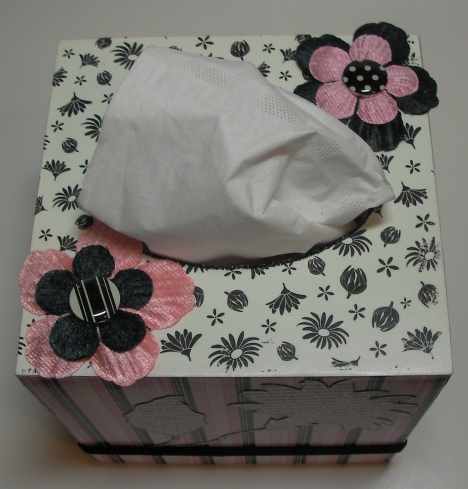
Here’s one of the items I had in the March issue of SNR.  Every month I have an article regarding items that have been altered for a specific room of the house and March happened to be powder rooms.  So along those lines, this is a nice elegantly girly cover for a kleenex box.  Gotta admit.  I love the idea, however I have altered both types of wooden tissue box holders and can’t for the life of me figure out why they would be made to NOT fit any of the tissue boxes on the market.  This one was from Don Mechanic for DecoArt and I have yet to find a box that fits into it.  So you have to take the kleenex OUT of the box then put them in.  

sany0032_edited1

Yea.  Didn’t make sense to me either, lol.  Anyways, I covered it in patterned papers from Making Memories and also handcut the print flowers from a paper from the same Valentine’s Day line.  I always like holiday lines that work well for non-holiday items.  🙂  I used a Staedtler pen to outline the flowers so they would be a bit more defined against the background and added some velvet ribbon (my favorite!) from American Crafts.  

I absolutely LOVE these chenille flowers from Creekbank Creations.  In hindsight, putting them on top of a kleenex box might not have been the most logical thing to do though, since the kleenex lint is drawn to them like a magnet.  The epoxy brads are from Making Memories.  The flowers and ribbon are attached using Helmar 450 Quick Dry Adhesive and the papers, of course, are Mod Podged on.  There’s also a thin line of black stickles around the opening.  

sany0034_edited2

Butterfly Photo Holder

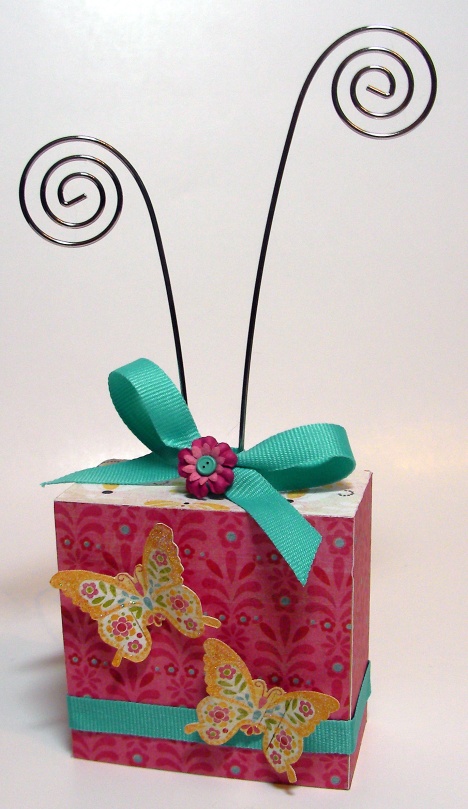
Another Michael’s unfinished wood find – $2 and because it’s basically just a block of wood – SUPER quick to alter!  If you’re looking for a beginner item to get your feet wet on altering, this would be an ideal project.   Simply cut your patterned paper (I used some Basic Grey) to the sizes of the sides and top.  

sany0032_edited

Adhere them using Helmar Professional Acid Free Glue.  Cut out a couple of butterflies from more Basic Grey paper (or whatever embellishments float your boat for your project), do a little bending for dimension and adhere using Helmar ScrapDots for even more dimension.  A little bit of Scribbles action to get things glittery, of course.  A quick bow out of ribbon, a few Prima flowers and a teeny tiny button brad (Making Memories – I just love these!) and it’s done.  Really.  It’s that easy!

Scrapbook News + Review May 2009 Calls

May 2009 Calls

By Style* (see special call below)


Caught Ya! Mischievous

Children’s Artwork

Graduation

Letter to My . . . husband, wife, son, daughter, friend, hero, etc.

Military & Serviceman (police, fire, emergency crews)

Pieces of Me


Call Guidelines

    Please submit your pages with the following guidelines:

  1. Pages only — no altered projects, home decor or mini albums, unless specified
  2. Of any size, i.e. 12″x12″, 8″x8″, 6″x6″
  3. Can be traditional, hybrid or digital (please specify)
  4. Please send image(s) as large as possible and we�ll scale down to size
  5. Please NAME your image with the title of the layout or project
  6. Call name must be specified in subject line
  7. No restrictions on whether it has been posted to an online gallery, blog or other site, but we respectfully request that you take them down when requested for publication.

    Important Note: Please register at our site before sending in your submissions. This will ensure that we’re able to properly contact you as well as authorize you to view the magazine should your artwork be accepted for publication. All submissions must include a SNR username.

Deadline: May 13, 2009

Send submissions to subs@scrapbooknewsandreview.com


Special Call

By Style

    In each issue of Scrapbook News & Review, we’ll feature scrapbook pages by style and skill level. As a chance to see as many styles and genres as possible, for this call only, we will not restrict the amount of submissions per scrapbooker. In fact, we would prefer to see at least 3 to 5 layouts per scrapbooker in order to give us an idea of how well defined your style is.

    We’re currently looking for pages and projects of any size or subject. It must be a clearly defined style, i.e. clean and simple, modern and graphic, shabby chic, classic, freestyle, eclectic, etc. Please include the style category you feel best describes your work.


Mini Album Call

    The above flap album is an example that is just bare bones. Now we’d like to see what you can do with it!

Here is a list of what you’ll need: 

3 pieces of cardstock cut to 6×12 
1 piece of patterned paper or cardstock cut to 6 x 11 
5 pieces of patterned paper approx 5 1/2 x 5 1/2 
8 pieces of patterned paper cut approx 5 1/2 x 2 1/2 
2 pieces of patterned paper or cardstock cut to 6 x 1/2″ 
2 pieces of ribbon approx. 18″ 
4 eyelets 

Score the cardstock at 3″ and 9″. Fold and use a bone folder to flatten the folds. 

Glue the 3″ flaps together so all 3 pieces of cardstock are attached to each other. 

Adhere patterned paper to the book. 

Punch holes in the 6 x 1/2″ piece of cardstock/paper about 1/2″ in apart in the middle of the paper. Thread your ribbon through the holes. Adhere these papers to the ends of the 6×11 paper. This is the part that wraps around the closed book. 

Close up the book and lay it face down. Line up the center of that 6×11 piece of paper with the center of the back of the book and adhere. Then wrap the corners around the front of the book and use your bone folder to flatten the folds. Don’t adhere the flaps.


Stay tuned – I’ll be posting the calls for the altered/home decor section later this evening.


Playing Catch Up

Wow.  There are tumbleweeds over here rolling across my blogland home, lol!  I have so much to catch up on I don’t even know where to begin!  My days have been busy, busy, busy lately and although blogging has been on my “to do” list for the past month, it just always seems to get skipped.  I blame Facebook.  You can come find me there if you want to make sure I’m not dead if I disappear like this again!  

So anyways.  Let’s see.  Let’s start with Scrapbook News + Review.   That would be where a lot of my time and energy is going these days and if you haven’t come by yet, trust me, you will want to!  We have got some truly amazing things that will be unveiled in the coming months, from HUGE new features in the magazine to some spectacular events planned.  I really don’t know how to even begin telling you how exciting this all is – NO other magazine, print or online, has the kind of content we have in the works right now.  Everything from our new kit club section that unveiled in the April issue to the fabulous new sections coming up, videos, TONS of techniques, big projects with manufacturers…we got it all, baby!  And don’t be shy – the staff has all been crazy busy behind the scenes getting all the new stuff figured out, but we’d LOVE to have you stop by the forum and chat with us!  We’re ALWAYS up for making some time to talk to other paper crafting enthusiasts – it’s why we DO what we do, lol!  

Speaking of SNR, I’ve still got all my March projects to share with you (eek – and a few left over from February – do you really still want to see Valentine’s Day though?).  I’ll get to those next so you should start seeing those all pop up and wake my poor little blog up.  😉

Next.  Helmar – wow, I’ve been creating up a storm with some fun new things they sent us and all of our fabulous new preferred manufacturer partners.  I’ll start getting some of that up as well!  For starters, this project went up today on the Helmar USA DT blog.  Go check it out for all the details on what I used and how!  

sany0036_edited

sany0037

Bittersweet Storage House

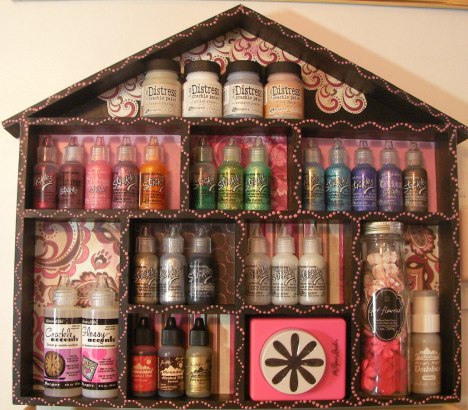
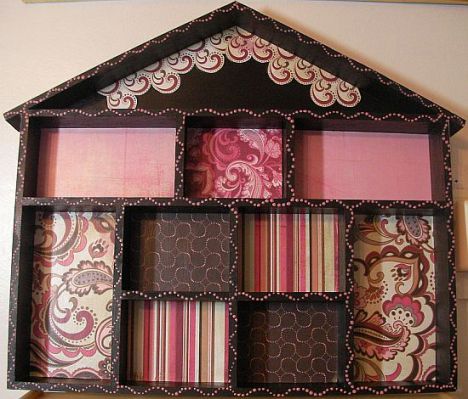
This piece was one I featured in an article in the February issue of Scrapbook News + Review on altered items for your craft room/studio.  I gave up on buying pre-made storage for my craft supplies ages ago.  I’ve found that by thinking outside the box I can come up with something custom-fit for just about any supply PLUS I get to alter it – woohoo!  I pretty much stalk the unfinished wood section of Michael’s.  Hobby Lobby is my other option, but I’ve found I don’t like their selection quite as well (or their quality – always check each piece before purchasing!) and they don’t change out their stock as often as Michael’s does.  When I came across this house shadow box (I think it was $5), my mind just raced with all the possibilities for what might fit into those cute little sections!  

sany0058_edited

I’ve pictured here a variety of things that fit into the sections, but I actually use it solely for my Stickles and Glossy/Crackle Accents.  I like having those out and handy plus being able to see the Stickles colors at a glance.

sany0055

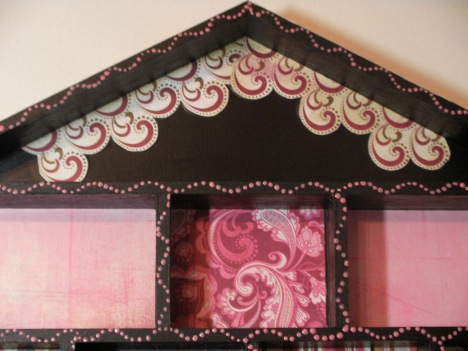
First I painted the whole thing with black acrylic paint (Jo Sonja’s by Chroma – it’s a nice, thick paint in a tube.  Step above craft grade, step below artist grade).  Then I started playing with the papers from the Bittersweet line from Basic Grey and just filling in all the spaces.  Paper packs are awesome for projects like this where you want a variety of papers – they’re all pre-coordinated!  I used an Xacto knife to cut out a few strips from one of the papers to decorate the “attic” area.  Then I just started dotting away with Scribbles (Duncan) in a shiny pink to make the edges more interesting.  Even with drying time on the Mod Podge and paint, I think the whole project only took me a couple of hours.  

feb-09-altered-artful-rooms-jenna-franklin-8-storage-house-empty

So next time you’re out at your local craft store, wander through the unfinished wood section and think outside the box!  Take a piece over to the scrapbook section to see what might fit – you might be surprised!!!

Spring Fling Crop at Scrapbook News + Review

snr-spring-fling-crop-09

There are buds on the trees and the birds are singing. We see flowers, and the weather is warming up. Whether Spring has made it to your area, or you only wish it had- Scrapbook News and Review has the perfect Springtime Celebration. Come celebrate Spring with us at the SNR Spring Fling Crop, Sat, March 21st. From 12-6 pm CST, we will have games, challenges, mini classes and loads of Scrapping inspiration in the forums. This is a grand afternoon of fun, planned for everyone’s enjoyment. Are you are scrapper or a card maker? Traditional, digital or hybrid? Do you love paper? So do we- and we have something for everybody! The fun will start with at noon CST, with a handful of Spring themes and inspired Challenges. These will be open for any form of project: scrapbook, cards, altered or digital. The fun continues with mini classes on a variety of topics and techniques, held hourly, all afternoon. Our talented staff and contributers have outdone themselves with these classes- and you are going to love it! As if all that wasn’t enough, just when you are ready for a break- we’ll be there for that too. The forum will be filled with fun topics, games and conversation to keep the party hopping. Makes plans to join us this Saturday, 12pm CST, on the SNR Forums. It is going to be a great day of Springtime Fun!

Heart Canvas Frame

Oops!  Still trying to get all these Valentine’s projects posted before the end of February.  😉

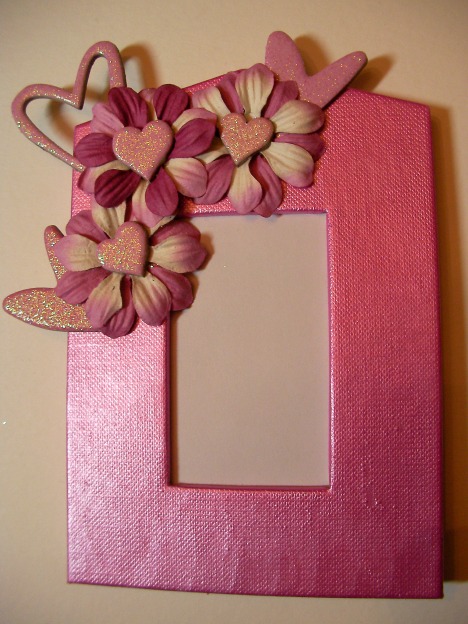
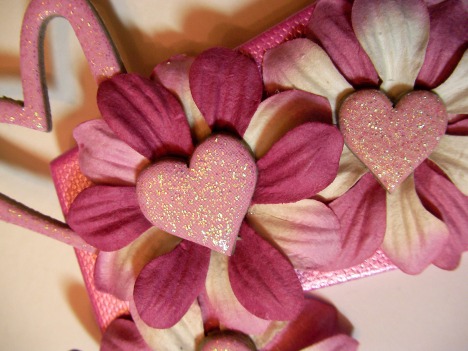
This little canvas frame took NO time at all.  You could literally make this in a half hour and give it for a gift a couple hours later (just to be sure the paint and glue were totally dry, lol).  The frame is one that EK used to sell – not sure if they still do or not?  Being canvas, it takes paint like a dream and I used Jacquard Lumiere paint to cover it in pink.  The rest is simply adding a few Prima flowers and some pre-glittered chipboard shapes from Scrapworks.  I used Helmar’s 450 Quick Dry Adhesive so it dried fast and strong.  Done!  Change up the colors and theme and you can have instant gifts for family, friends, relatives, teachers…

sany0009_edited

sany0010_edited

Anti-Valentine ATC

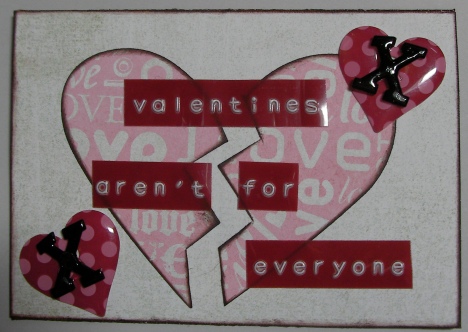
Obviously, despite loving to make projects for Valentine’s Day, it’s not exactly my favorite holiday, lol.  I made this ATC to temper all the lovey-dovey stuff I was making but not “feeling” this year.  Patterned papers and sticker from the Basic Grey Bittersweet line.  I cut the sticker and inked all the edges of the sticker and the ATC.  The epoxy hearts were actually one of the puffy ones from Making Memories that I simply split in half and used both sides.  The metal letters were originally gold and I covered them with alcohol ink to change the color.  I used the Around the Block tape embosser to do the wording.

sany0004_edited

SNR March 2009 Altered/Home Dec Calls for Submissions

Scrapbook News and Review is looking for your altered and home décor creations.

The Details:

-Must include complete supply list

– Please send each item in a separate email unless they are part of a set

–Photo must be a minimum of 650 pixels on longest side, 72dpi preferred

-Please include contact information

– Projects may be previously seen. If chosen, we respectfully request they be removed from any blogs or galleries. An ‘Out for Publication’ sign will be provided upon request.

Send submissions to: jfranklin {at} scrapbooknewsandreview.com

March 2009 Calls

Artful Rooms: Items that can be altered for use in the bathroom. Here’s a hint – this is a GREAT place for little altered storage/organization items!

Options: Baskets that have been altered

Seasonal: Easter and Spring altered decorative items

Wearables: Jewelry, totes, and other wearable items created using scrapbook/stamping supplies

ATC Alley: Designer’s choice – let’s see your latest and greatest Artist Trading Cards!

Deadline February 25, 2009

Bittersweet Hearts Canvas

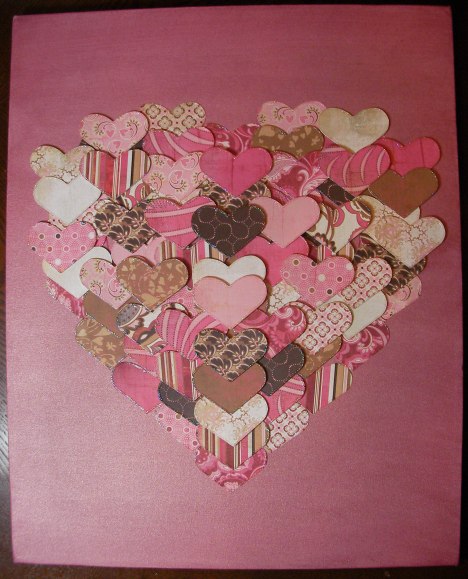
Ready for the late Valentine’s Day flurry?  I know.  You usually get the bulk of my holiday items right after the holiday, lol, but it’s because they’ve been in Scrapbook News + Review magazine and I can’t post them here until the month following the issue debut!  This is a 16″x20″ canvas I did using the new Basic Grey Bittersweet collection and a couple of fun techniques.  Oh!  And I’ve also got another Valentine project (a small dollar store frame) up at the Helmar DT blog today – be sure to check that one out for another fun technique!

sany0005_edited

Let’s start with the canvas itself.  I knew the effect I wanted, but on a canvas this size, knew I didn’t have enough Glimmer Mists or even the right shade to make this work.  So I made my own spray.  I took a spray bottle (actually it was the one I was using to spray the cat when he did something bad so now I need to get a new one for that purpose, lol) and mixed several shades of Lumiere paint (Jacquard), Pearl Ex (Jacquard), walnut ink crystals (to tone it down when it was a bit too bright) and water.  I couldn’t begin to tell you how much of what colors because I looked like a mad scientist – add a bit of this and a lot of that – until I got it to spray the way I wanted.  Then I layered it onto the canvas.  The first couple of layers I sprayed then wiped with a soft cloth (first one direction then the other, alternating as each layer dried) then started letting some of the droplets remain so it didn’t look so precise.

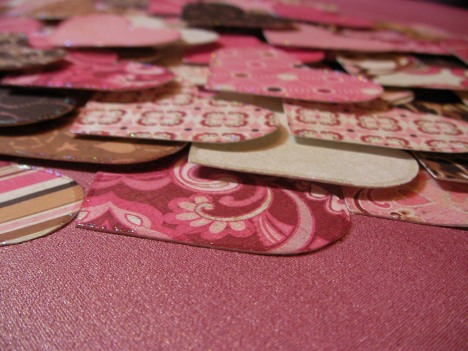
Then there was the issue of the hearts.  I do have a heart punch somewhere, but only about a 1″ size and I wanted a much bigger one.  So I looked for one.  For a week or two.  In every store within an hour of here.  LSS’s, craft stores – NO ONE had a heart punch in anything over about an inch.  A month before Valentine’s Day.  I was livid, lol!  When I was a distribution buyer, I always made sure we had those in stock well in advance of the holiday so that when the stores began prepping for Valentine’s Day we’d have them ready for them (so I had them in stock back in early December).  Well apparently with the influx of diecutting machines (which I’ve still never broken down and bought), no one carries much in the way of punches anymore – even basics like a heart.  Sooooo, I dug out my old trusty Coluzzle.  Yea, I’m old school, lol!  And proceeded to cut almost 200 hearts out of each sheet out of the Bittersweet pack (I still have a TON of this paper left too – just no full sheets).  Then I used Scribbles to outline the edges of every single heart with a clear glitter to get a subtle sparkle.  I usually don’t spend this kind of time on projects, but this one took several days to complete.

I finished up by tracing one of the 8″ Making Memories chipboard hearts from a couple of years ago (watch for the heart itself to show up as a magnet I made) onto the canvas and began layering the hearts into a heart shape.  I built up layers using Helmar Liquid Scrap Dots.  These are so cool!  I used an entire tube of them on this but just couldn’t stop myself from layering them higher and higher, lol!  They do take some time to dry so I could only do a few layers at a time then would have to stop to allow them to dry so that I didn’t inadvertently flatten them when I pressed on the next layer.  But it was addictive, lol, and I loved watching it take shape as the layers built up!

sany0006

SNR Presents Card Universe!

card-universe-banner

Love making cards? Love stamping? Love talking and learning about making cards? So do we!! Scrapbook News and Review is thrilled to present an entire universe created just for you!! The SNR Card Universe is built with the card maker in mind, and has resources you have only dreamed of having at your finger tips! Resources that include: Sketch Vault: We have included an entire gallery dedicated to card sketches. Video Archive: We have pages and pages of card making videos already cataloged for your viewing pleasure. We have gathered videos from all over the web into one easy to navigate collection…and we would love to add yours, too. Tutorial Library: We have gathered a huge list of fun and exciting tutorials for you to try. Blog Roll: Our Blog Roll is divided into Sketch Sites, Challenge Blogs, and Card Making Blogs for easy navigation. Event Calendar: Want to know what is going on in the Card Making world with a single glance? Here’s your source. Forums: Ever wish there was a forum just for card makers? Well, now there is! Come visit with us, discuss your passion, and make new friends! We can’t wait to meet you! The hottest new online Magazine is launching the hottest new online card making community…and you are invited!!

Click on the banner above to go to SNR’s Card Universe!

Boxer Green Necklace and Earrings

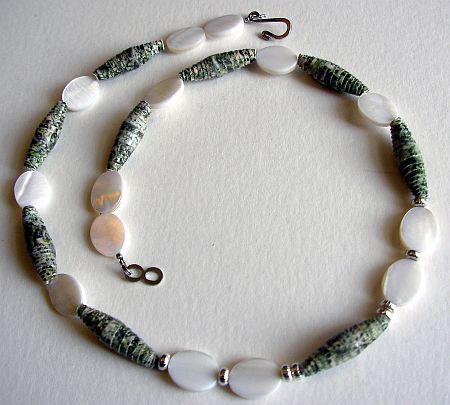
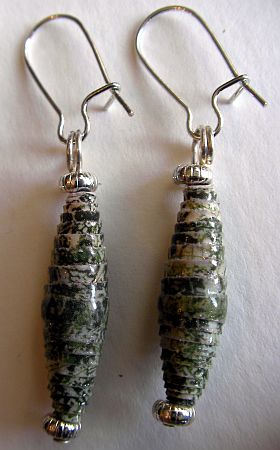
This was the other necklace and earrings set I used in my paper bead tutorial on Scrapbook News + Review in the November/December issue.  I used another paper from the Basic Grey Boxer 6×6 pack I picked up and was sooooo thrilled with how they came out!  In my regular beading, I love using semi-precious stones, especially things in the jasper and similar ranges that have that lovely natural variation.  This particular paper, once rolled, looks so like real stone but is a fraction of the weight (and cost, lol).  I’ve had back and neck problems for years so really heavy necklaces bother me after a while but I can wear this all day and not even notice it.  The MOP ovals are from Cousins and all the rest of the findings are from Fire Mountain Gems.   I used the same finishing process that I posted the instructions for a few posts ago.

beadmaking-article-12

beadmaking-article-13

Wooden Sign Ornament Trio

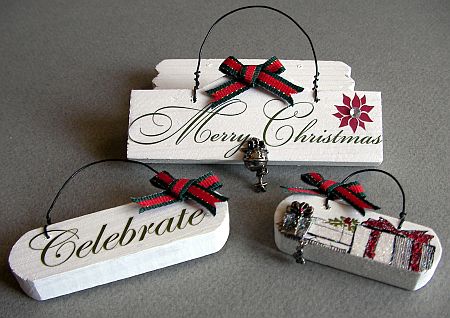
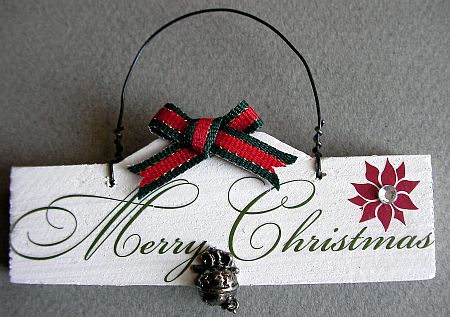
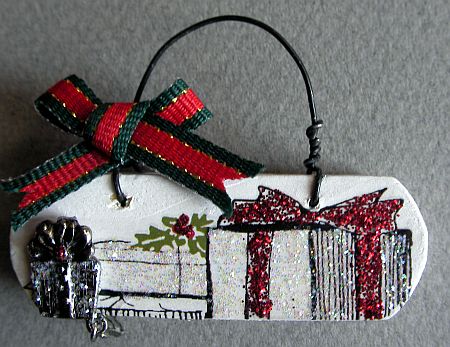
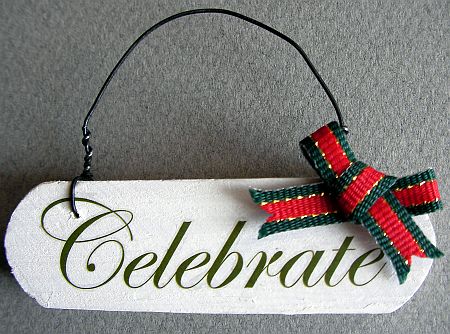
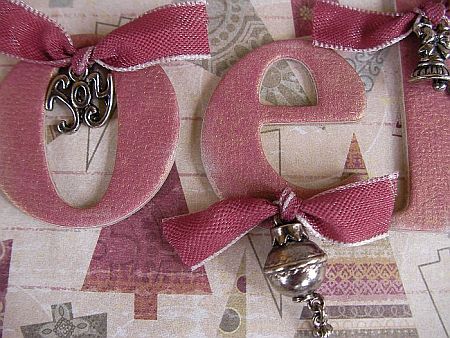
Here are a few more of the ornaments I’ve been making from my little wooden signs.  I really have enjoyed how quickly these come together – I suppose one could make them much more complex, but I think they’re fun as is, just using some quick rubons and baubles.  This little trio went into the November/December issue of SNR.  Again, I simply painted them a base coat of white.  The rubons are from Making Memories, the bows from EK (they were actually part of a sticker set), the rhinestone from Westrim, Stickles from Ranger, and these darling “Changles” charms from Provo.  I’m thinking I might do a mini tree just with these sign ornaments for next year!  Maybe with some fabric bows?

nov-08-altered-home-dec-options-wood-ornament-trio-jenna-franklin-8

nov-08-altered-home-dec-options-wood-ornament-1-jenna-franklin-8

nov-08-altered-home-dec-options-wood-ornament-2-jenna-franklin-81

nov-08-altered-home-dec-options-wood-ornament-3-jenna-franklin-81

Noel Ornament/Stocking Hanger

I know, I know, Christmas is over and you probably don’t want to see these, but I still have a few Christmas projects to share with you that were in the November/December issue of SNR!  So bear with me and I’ll try to get them all done up and scheduled for the upcoming week then I’ll move on, I promise!

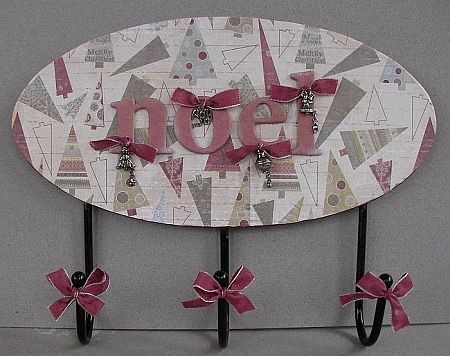
I made this as a hanger to hang a few special ornaments on.  The plaque with hooks was from Walnut Hollow and one I’ve used before (I use this one to hang my purse and keys on in my entryway) – it alters quickly because it’s a single, simple shape to cover and you can spend your time in decorating mode.  🙂  I used some paint from I started with some Scrapworks paper and the chipboard letters are also Scrapworks.  The ribbon (from L’il Davis Designs from years and years ago) has lightweight wires so that helped with my bow-tying deficiencies, lol!

nov-08-altered-home-dec-seasonal-noel-ornament-hanger-jenna-franklin-8

What you can’t see well in the picture is that I used a gold glaze from Delta/Rubber Stampede over the whole thing.  I wet down a makeup sponge, wring the excess water, then use that to apply the glaze all over.  Tap it off on some scrap paper first so you’re applying light layers and build them up.  Pretty much the same technique I use with the Making Memories glazes.   Over the front it’s pretty light (catches the light beautifully though) and I used a lot more on the sides, which you can’t see.

nov-08-altered-home-dec-seasonal-noel-ornament-hanger-detail-jenna-franklin-8

The charms are also really old from Provo Craft.  I LOVE these and have carefully hoarded my little collection (the product was called “Changles”) – aren’t they darling!

Playtime at the Pole Crop at SNR!

You’re invited to our Playtime at the Pole All-Day Christmas Crop as we celebrate Christmas with a full day of fun. This Saturday, December 13, 2008, we’ll be headed to the Pole . . . the North Pole, that is.

We have a full day of activities planned, including plenty of games, challenges, fun and a whole lot of prizes! We’ll be spending the day helping Santa and all his elves prepare for Christmas and we’ll have a great time doing it, too. So make plans to join us this Saturday, December 13, 2008 in the Scrapbook News & Review Forums. It’s going to be a great day!

Special double issue of SNR magazine

The special double November/December issue of Scrapbook News + Review magazine dropped tonight!   Huge.  Trust me – no print magazine has this much content in two issues, much less one!  Plus, if you subscribe now, as always, you gain access to EVERY issue we’ve put out so far.

Speaking of great content, if you’re not on the newsletter list (free and separate from the magazine subscription), go sign up now!  We’re halfway through our two weeks of Christmas extravaganza and things are kicking up a notch this week!  Every day you’ll get a newsletter with a project, tip, or technique, links to our featured blog in the “Blog-a-log”, and more!  All the fun wraps up on the 13th with an all day online crop you definitely won’t want to miss!  Come join us!!  We’d love to have you!!

OH!  And did I mention prizes… 😉

Bluebell Bracelet

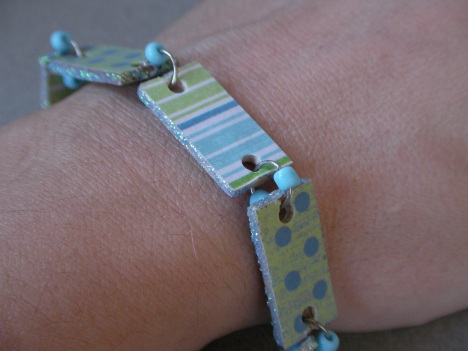
Another piece from the Wearables section of the October issue of Scrapbook News + Review.  Just a simple, fun little bracelet using Bo Bunny paper Mod Podged to small wood tiles.  Each tile got edged with Stickles then I used a Crop-A-Dile to get the holes for the jumprings.  I added some coordinating beads to the jumprings because I had to use such large jumprings it just looked empty until those little beads made everything come together!  The magnetic clasp made this much easier to put on/take off.

oct-08-altered-wearables-jenna-franklin-bluebell-bracelet

sany0012

In answer to the question about where to find the tiles, I buy lots and lots of similar items.  Check in any craft store in the unfinished wood section.  They are usually bagged and hanging and come in various shapes, sizes, and mixes – all very inexpensive.  Please note that there will generally be some warped pieces in each bag so just check each piece before you use it and if you need a certain number, grab an extra bag just to be sure you have enough.

As for using Scrabble tiles, yes, you can make a bracelet with them, however I would probably change how you do it.  Since a Crop-A-Dile isn’t going to go through it, you’ll need to use a drill.  Because the tiles are smaller than these (but much thicker), I’d recommend going through from the side rather than the top and stringing them rather than having to use really huge jumprings.

Passion Earrings

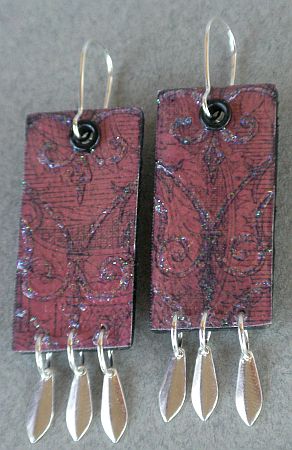
Never waste even the smallest scraps of paper!  I don’t even remember what I used this paper from Marah Johnson on originally, but digging through my scraps basket I came across the fact that I had this motif still accessible multiple times.  Some of the background imaging is different, but the main scrolly images were intact.  I had some chipboard blanks (from Creekbank Creations) on the table and they just fit over the area I wanted to work with perfectly so I decided they’d make perfect earrings!  I Mod Podged them on, added a little bit of Stickles (Ranger) and decided that was all they needed.  I had tried a few odds and ends to add to them, but I really liked the design too much to mess with adding rhinestones or anything else I had sitting around, so just left them.  I used a Crop-A-Dile to do a hole in the tops (and added eyelets to strengthen them) and also holes in the bottom to hang some simple silver drops (Fire Mountain Gems) from.

The earrings were in the Wearables section of the October issue of Scrapbook News + Review.

oct-08-altered-wearables-jenna-franklin-passion-earrings

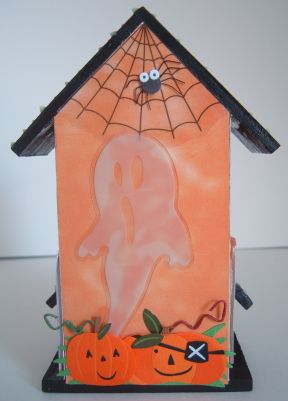
Haunted Mini Birdhouse

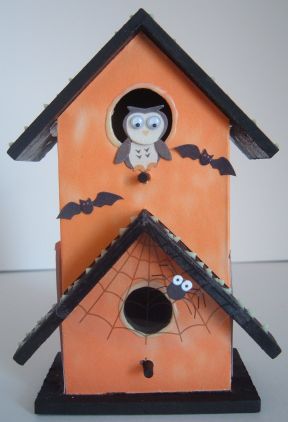
Another birdhouse I actually finished last year but after the holiday and I just saved it for this year and then it went into the October issue of Scrapbook News + Review so I’m just now sharing it.

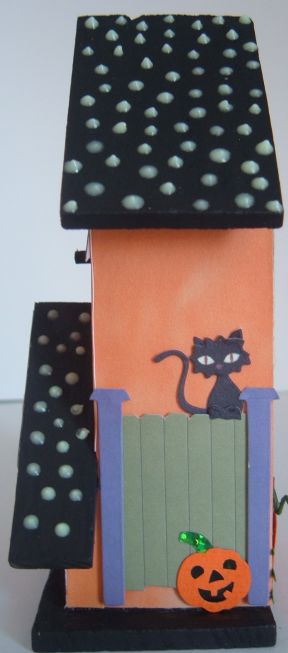
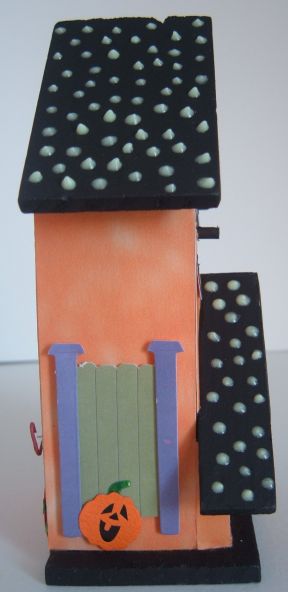
The paper is from Zsiage and I decorated everything with a mix of Jolee’s stickers from EK and some transparent elements from Making Memories.  The transparent spiderwebs are kind of fun because they’re actually set onto the outer roof lines so it looks like they’re hanging in the eaves.  I don’t remember what kind of adhesive I used on the ghost, but obviously it wasn’t the best choice (ahem, and I’m assuming I chose something that SAID for vellum/transparency…).

But my absolute favorite thing about this birdhouse is the roof. Or roofs.  Those little dimensional polka dots?  GLOW-IN-THE-DARK Scribbles!  So much fun!  My son got the biggest kick out of how it lights up, lol!

halloween-mini-birdhouse-front-jenna-franklin

halloween-mini-birdhouse-back-jenna-franklin

halloween-mini-birdhouse-side-1-jenna-franklin

halloween-mini-birdhouse-side-2-jenna-franklin