• Live Life Inspired. Dream With Possibility! Donna Downey
  • May 2024
    S M T W T F S
     1234
    567891011
    12131415161718
    19202122232425
    262728293031  
  • Categories

  • Follow me on Twitter – michaelcsmommyj

  • Top Posts

  • Top Clicks

    • None
  • Top 21 Craft Sites
  • Directory of Crafts Blogs
  • Blog Directory

Tissue Box Cover

Well Central Illinois is now officially under water.  Or at least my basement is.  At least it’s going to be a great day to hang out at home and do some creative things!  

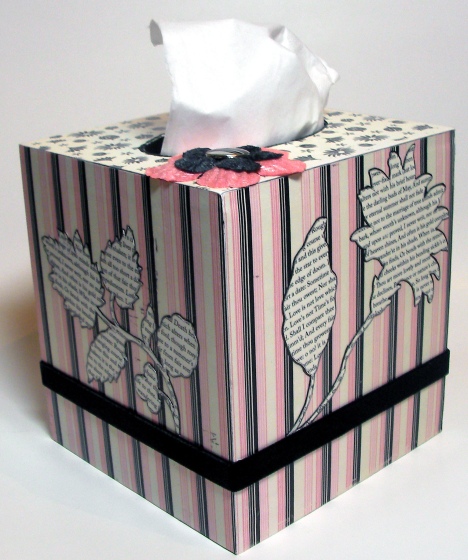
Here’s one of the items I had in the March issue of SNR.  Every month I have an article regarding items that have been altered for a specific room of the house and March happened to be powder rooms.  So along those lines, this is a nice elegantly girly cover for a kleenex box.  Gotta admit.  I love the idea, however I have altered both types of wooden tissue box holders and can’t for the life of me figure out why they would be made to NOT fit any of the tissue boxes on the market.  This one was from Don Mechanic for DecoArt and I have yet to find a box that fits into it.  So you have to take the kleenex OUT of the box then put them in.  
sany0032_edited1

Yea.  Didn’t make sense to me either, lol.  Anyways, I covered it in patterned papers from Making Memories and also handcut the print flowers from a paper from the same Valentine’s Day line.  I always like holiday lines that work well for non-holiday items.  🙂  I used a Staedtler pen to outline the flowers so they would be a bit more defined against the background and added some velvet ribbon (my favorite!) from American Crafts.  

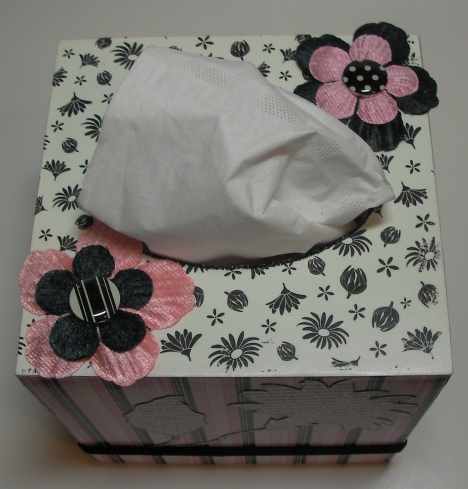
I absolutely LOVE these chenille flowers from Creekbank Creations.  In hindsight, putting them on top of a kleenex box might not have been the most logical thing to do though, since the kleenex lint is drawn to them like a magnet.  The epoxy brads are from Making Memories.  The flowers and ribbon are attached using Helmar 450 Quick Dry Adhesive and the papers, of course, are Mod Podged on.  There’s also a thin line of black stickles around the opening.  
sany0034_edited2

Beautiful Life Wall Hanging

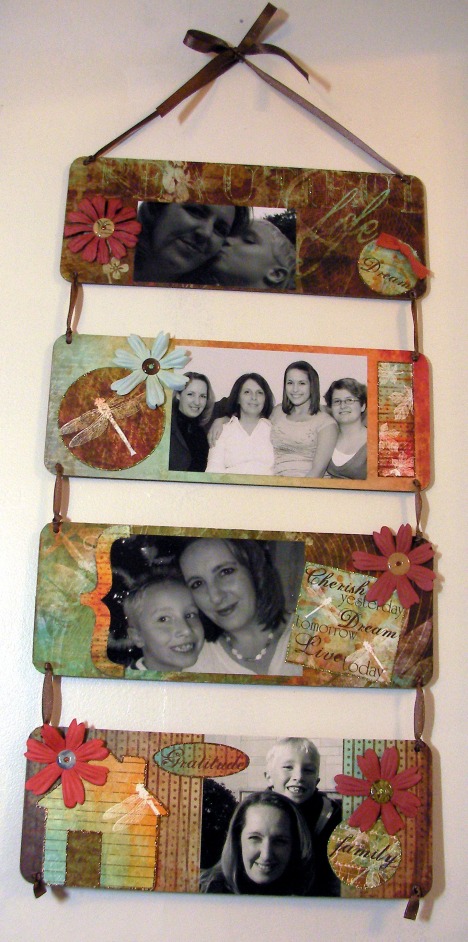
This was a project I made for Helmar that went to CHA to go in the booth.  I miss it!  This paper line from Bo Bunny really looked great in my living room – going to have to hunt down some more and make a new one, lol!  For the base of the wall hanging, I used chipboard pieces from Creekbank Creations.  I think I’ve mentioned their chipboard before as I use it especially on jewelry.  It’s much denser than anything else on the market so it’s super strong and will hold up to any kind of application – paint, Mod Podge, inks, etc. without any warping.  They are local for me, so I can get my hands on their products easily but it’s not as readily available elsewhere so if you’d like to try it, you’d probably need to check their online store or see them at an event.  They have a whole second “store” that travels to all the CK conventions and lots of other events.  So if you’re at one of those, stop by and try this chipboard – they have lots of mini books and shapes and pages of cutouts plus will do custom word books.

Anyways, back to the project.  Again, I relied mainly on the paper and a page of cutouts that goes with the Beautiful Life line and just accented with lots of Stickles.  Some Prima flowers and epoxy washers from EK (Rebecca Sower’s Attic line) and a piece of ribbon from American Crafts and lots of Helmar adhesives to put it all together!  The little wooden house shape was a craft store find – they came in a package of four for $1, I think.

sany0001_edited

sany0005_edited2

sany0006_edited1

sany0007_edited1

sany0008_edited

Love is All You Need Magnet

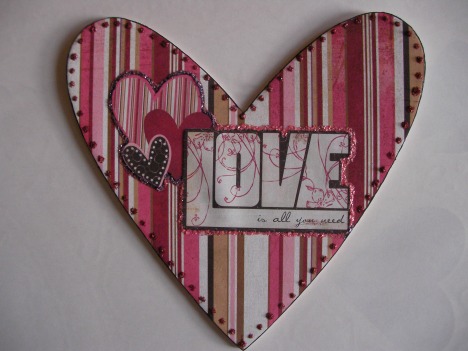
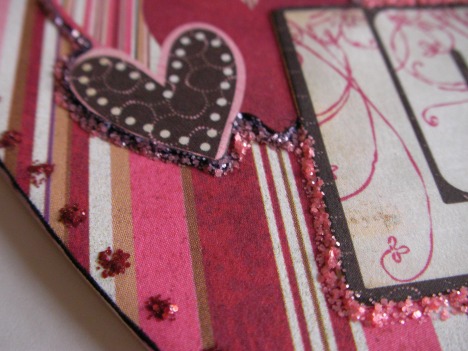
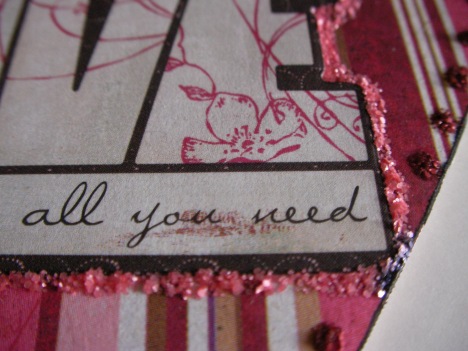
This was a quick little project that pretty much just came from the need to play with the Basic Grey Bittersweet line some more.  😉  I used a chipboard heart from Making Memories and covered it with the striped paper.  Then the hearts and quote are both stickers I layered and then edged with Distress Stickles (Ranger).  The dots around the edges are more Distress Stickles.  Added 3 small button magnets to the back using Helmar’s 450 Quick Dry Glue and voila – instant love for my fridge.

sany0007

sany0008

sany0009

Joys of the Season Ornament

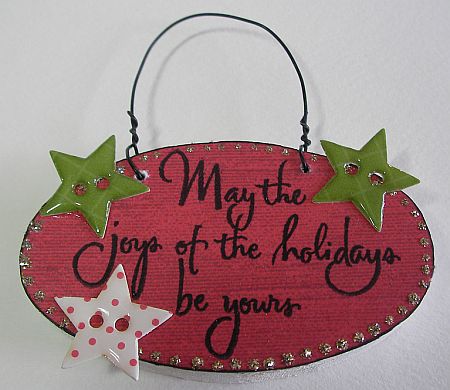
Last of the little sign ornaments – I promise!   The patterned paper is from HOTP.  The stamp is from Wordsworth (I always loved their stuff!).  Ink and Stickles from Ranger.  The epoxy buttons are from Making Memories.

nov-08-altered-home-dec-options-joys-of-the-season-jenna-franklin-8

Wooden Sign Ornament Trio

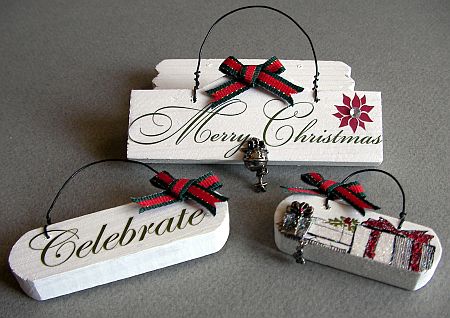
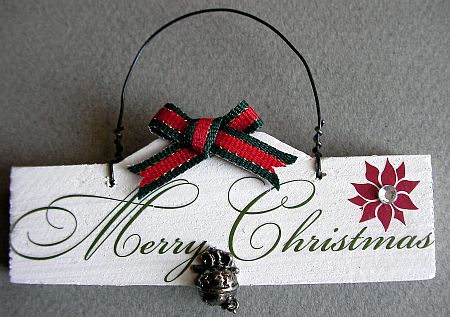
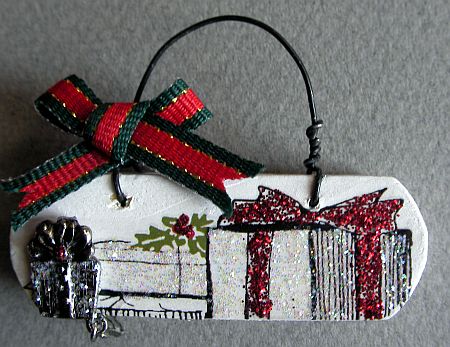
Here are a few more of the ornaments I’ve been making from my little wooden signs.  I really have enjoyed how quickly these come together – I suppose one could make them much more complex, but I think they’re fun as is, just using some quick rubons and baubles.  This little trio went into the November/December issue of SNR.  Again, I simply painted them a base coat of white.  The rubons are from Making Memories, the bows from EK (they were actually part of a sticker set), the rhinestone from Westrim, Stickles from Ranger, and these darling “Changles” charms from Provo.  I’m thinking I might do a mini tree just with these sign ornaments for next year!  Maybe with some fabric bows?

nov-08-altered-home-dec-options-wood-ornament-trio-jenna-franklin-8

nov-08-altered-home-dec-options-wood-ornament-1-jenna-franklin-8

nov-08-altered-home-dec-options-wood-ornament-2-jenna-franklin-81

nov-08-altered-home-dec-options-wood-ornament-3-jenna-franklin-81

No snow day, so the Christmas party is on!

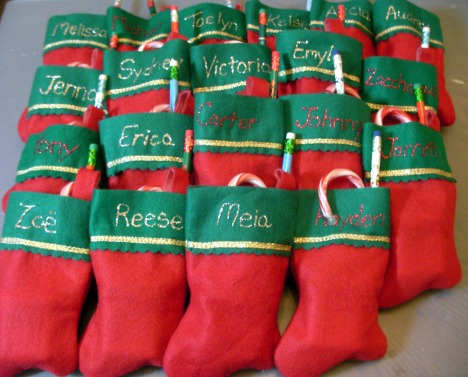
I was torn.  I really was.  On the one hand, the thought of a snow (ice)day made me happy, knowing that if the roads were iffy I’d have to drive into town to Michael’s school for the party and I hate winter driving.  BUT, after making 20 of these

sany0002_edited

to help fill 20 of these

sany0005_edited2

for all of Michael’s classmates, I probably would have been disappointed, lol!  I’m going in this morning to help with the schoolwide cocoa celebration (they’re even bringing Santa in this year!), then off to the separate classrooms for fun and storytime (they all wore their pajamas this morning) for the rest of the day.  It’s a photo op I’ve been looking forward to, lol!  So luckily not nearly as much of last night and this morning’s rain turned to ice as they expected.  Traffic through my street has been moving at a normal pace and I haven’t seen any slipping.  And my own sidewalk is MUCH less slippery due to the rain washing away most of my ice and leftover snow.

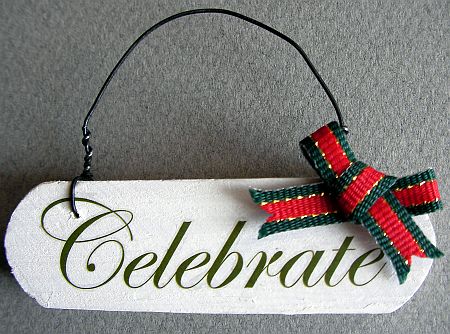
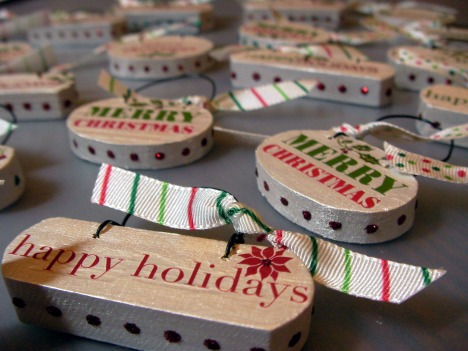
For the wooden ornaments, they are more of the Darice wooden signs I’ve been using for ornaments (these are the smallest sizes), painted with pearl white (it has a mica in it) Jo Sonja’s.  A word about this paint.  A company called Chroma out of Australia makes this and it is FABULOUS.  hands down, it is my favorite acrylic paint.  It comes in a tube rather than a bottle and is much thicker (very much like the proverbial “butter”) than your standard craft acrylic.  It’s a definite step above your Apple Barrel, Ceramcoat, and the like (Making Memories paints fall into this craft category), but a step below your fine art acrylics like Golden.  For most applications, one coat is sufficient.  The colors are rich and as the tube says, “velvet matte finish”.  It’s not cheap.  But it’s well worth the price.  I don’t use it on paper, but LOVE it on wood, acrylic, and such.  I bought an entire CASE (closeout because it had been in a display) back when I was with Herr’s.

sany0002_edited1

Ok.  Commercial over, lol!

Back to the ornaments.  I kept it very simple and just kept adding more of the rubons from the same Making Memories rubon booklet (this booklet has given me soooo many projects and there are still a ton left in there!).  Some American Crafts ribbon, some Stickle action, and I called it a day.  All in all, they took me about 2 and a half hours from starting with the paint to setting them aside for the Stickles to dry.  For 20 of them.  Not bad. AND, figuring up the cost of materials used (and using percentages of things like the rubons), I think the whole project was probably about $4.  Definitely not bad!

Well, off to the school!

Wintery Frame

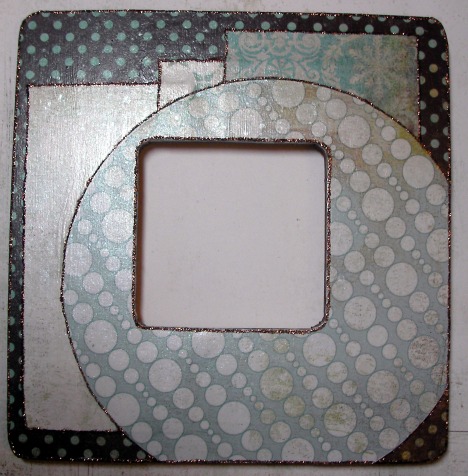
I made this frame (of course it’s one of the Michael’s $1 frames) last weekend from a sketch challenge at SNR’s Christmas crop.  I had skipped some elements (stitching around the outside and the title and journaling section in the top left corner).  The papers are all Basic Grey, outlined with my favorite – cinnamon Stickles.  The whole thing is also heavily sprayed down with Glimmer ist (especially the sides – the silvery blue over the brown paint ties in really nicely with the papers on the front) The picture of it has been sitting here on my computer waiting to be posted, but the frame itself has been sitting on top of my monitor mocking me.  Sitting across the room from it last night I finally figured out I didn’t like it the way it was and finally knew why.  Here’s how it originally looked:

sany0008_edited

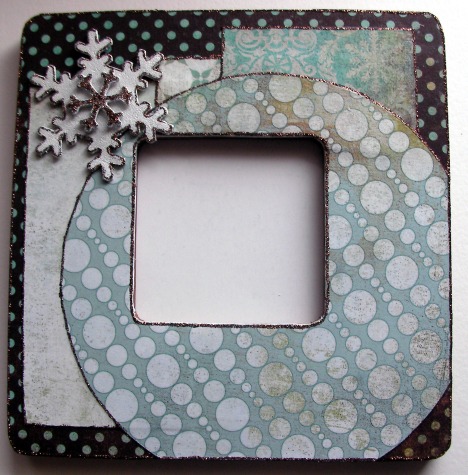
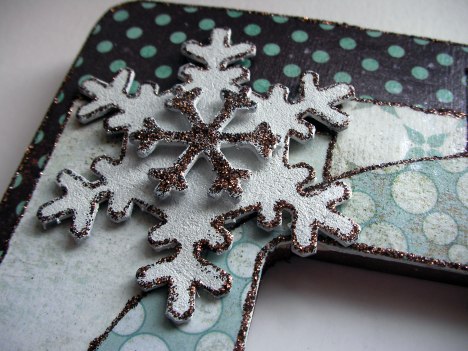
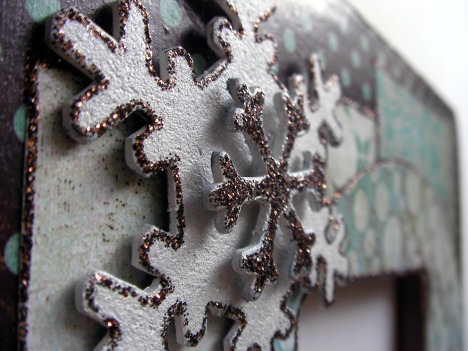
Yup, it needed a snowflake up in that corner!  I had known I wanted to use it with a snow day pic of my son (which is also why I “moved” the big roundish element from the bottom right hand corner up a bit – originally it was more of a side of a sunset look and I wanted more of a snowball look so pulled it out of the corner a bit).  So how I hadn’t thought of adding a snowflake before eludes me.  🙂  Maybe because I’m rebelling against winter in general, lol – the only good snowflake is a crafted version, IMO!  So anyways, here’s the final version.  It’s grungeboard (LOVE this holiday themed set – so glad I begged my lss to get it in for me!)  I squished it onto my moonlight white Brilliance pad (my go-to inkpad for snowflakes this winter, lol) then hit it with the same Glimmer Mist (Frost) to get the blue tones into it.  Adhered it with some Helmar Scrap Dots to pop it up a bit then edged it with the cinammon Stickles.  I layered a second grungeboard snowflake covered in Stickles over it with more Helmar Scrap Dots (really loving this stuff!).  I almost started fluffing with it some more, digging through my embellishments to see what ELSE I could add to it, but much as I love the whole layered/piled on look, I just can’t make myself do it most of the time.  I get to a point and just decide “it’s done”.  One of these days though – because I’ll NEVER whittle this stash down if I don’t start getting it USED, lol!

sany0003_edited

sany0004_edited1

sany0005_edited1

Wreath and Tree Ornament

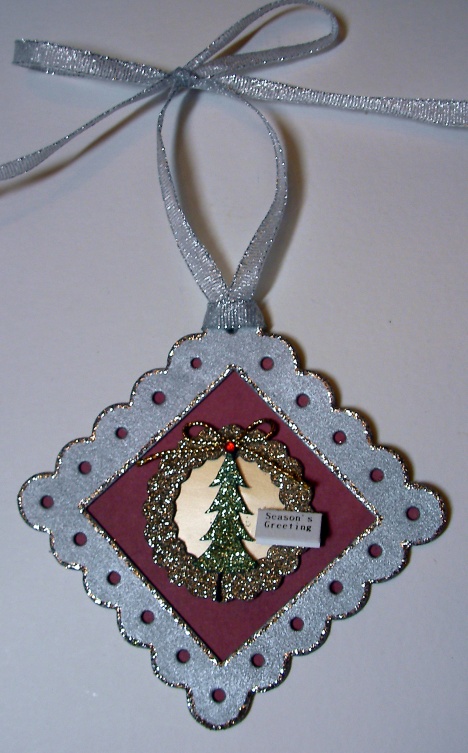
Looking at the title of this blog post makes me feel really un-creative, lol!  Ah well.  It is what it is!  This ornament just kind of happened – adding things piece by piece here and there over the space of a few days every time I’d walk by and think of something that might work.  Actually recreating it would probably only take about five minutes of work and some drying time.

sany0019_edited

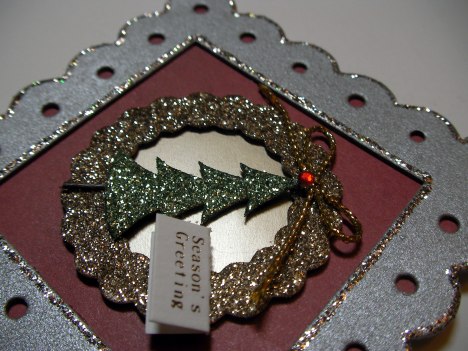
I started with a chipboard frame from Making Memories and a scrap of Cosmo Cricket paper I’d used on something else.  Loved the way the red (now THAT is a Christmas color…pink is not…) came through the holes and decided to sponge on watered down Making Memories silver glaze (wet a makeup sponge and dab it into the glaze then onto the project – the water will help give a nice, even coverage) to sharpen the contrast.  I picked the platinum Stickles to edge it with simply because I’m rather fond of the platinum at the moment, lol!  Luckily I liked the look when it was dry.  AND, how’s this for serendipity?  I pulled out some ancient Jolee’s stickers with just a couple stickers left on the sheet and the glittered wreath just so happens to be the exact shade as the platinum Stickles.  This ended up being the holdup for the longest time though.  I thought it looked stupid with the pretty sparkly wreath and the little white Season’s Greetings card in the middle of it (the way it originally looked).  After several days trying various things I came across (pictures, rubons, patterned paper…)  it finally dawned on me that the only other sticker left on the sheet was this cute little tree.  I had originally overlooked it since it wouldn’t fit IN the wreath.  It did, however, fit beautifully ON the wreath!  I even ended up keeping the little card, adding it off to the side.  Added some ribbon and I’m happy now!  Another sparkly little ornament!

sany0021_edited

Peppermint Candy Tree

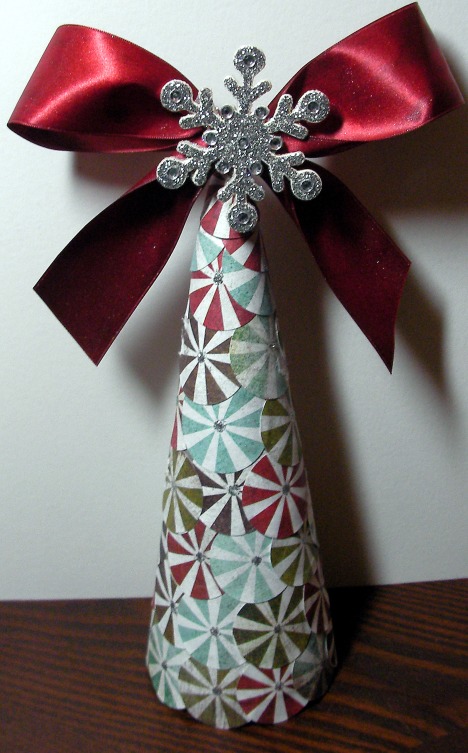
I bought a package of these paper mache cones at Michael’s ages ago meaning to play with them for Christmas.  They were over in the decoupage section (with the decorative tissue papers and such) by a company called Artifacts and they’re really nice, thick paper mache.  The cones don’t go all the way to a tip though, which made finishing off the top difficult (lol – the reason the bow became part of the design…).

sany0064_edited

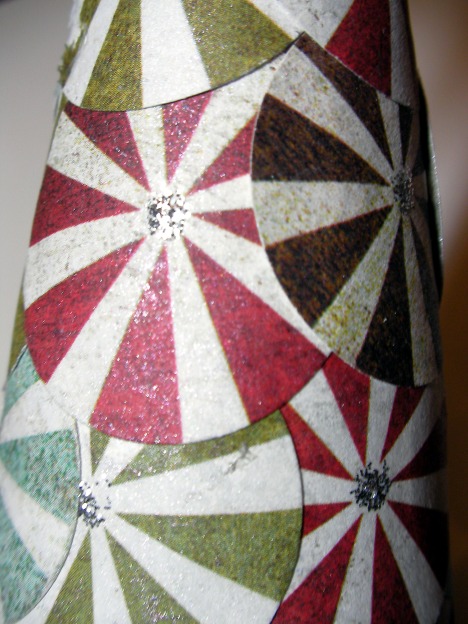
I used an EK circle punch to punch out the peppermint candy looking designs from a sheet of Basic Grey paper and just started gluing them onto the base using a liquid adhesive (quick drying, since you have to sit and hold the papers down until it tacks).  After all the circles were attached (and some fidgeting with the top to create a cone where there was none), I added Stickles to the centers for some bling.  Then I misted the whole tree with Glimmer Mists.

sany0067_edited1

I found this piece of nice, satin ribbon but it was a bright red, which didn’t match the darker red in the paper. So I started playing with the glimmer mists and finally after a mixture of a brown and a black mist and spreading it around with my fingers, I got the look I wanted (well, kind of).  It’s a bit splotchy in places, but the paper itself had a bit of a distressed effect as well so I decided I liked it after all.

sany0068_edited

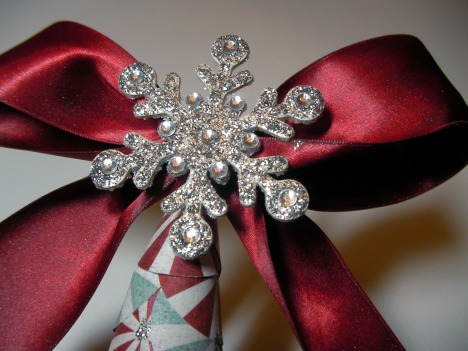
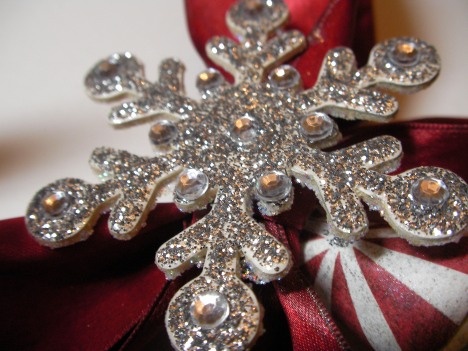
To finish it off, I took a snowflake from Technique Tuesday and covered it in Stickles then added a bunch of rhinestones from Westrim as well.

sany0066

Snowflake Tree Coaster Ornament

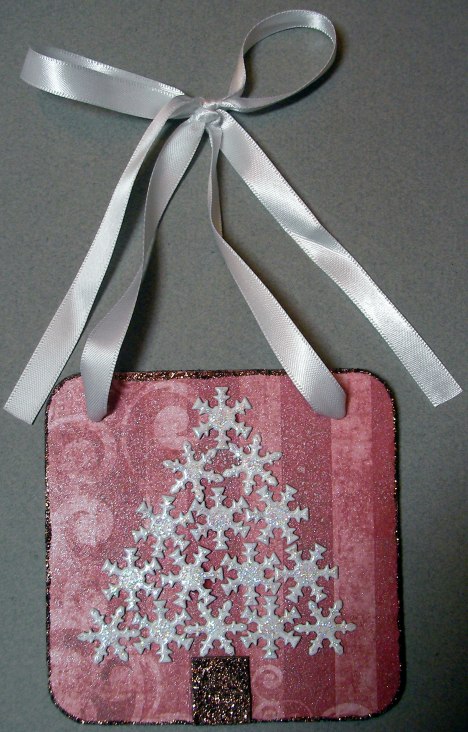
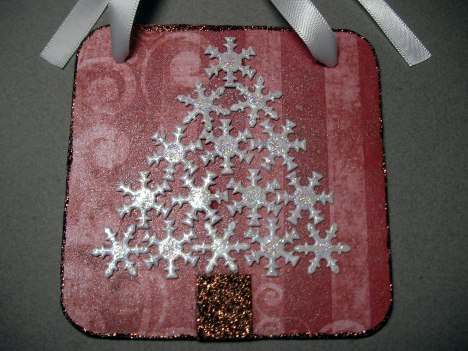
I keep seeing those cute projects where buttons have been laid onto paper in the shape of a Christmas tree.  And I want one.  Only I got sidetracked!  In hunting down enough white buttons, I came across this entire container full of shaped brads.  It’s FULL and I never, ever even open it.  Well I had one entire drawer full of snowflake brads in several colors, sizes, and styles.  Including tons and tons of white!  so I decided to do a small scale version of the button project I will someday do (lol) using a Bazzill coaster and some of those brads.  I covered the chipboard with Bo Bunny paper, then clipped off the legs of all my brads and glued them on.

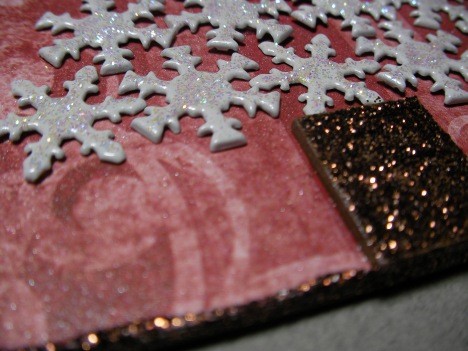
I’m having a really sparkle thing going here lately so I decided to bling it up and sprayed it with Glimmer Mists.  Of course it wasn’t sparkly ENOUGH yet (plus the mist doesn’t stick really well to those brads) so I went back over and added Stickles to everything (snowflakes, chipboard “trunk” and around the edges of the coaster itself).  A couple of holes with the Crop-a-dile and some ribbon to hang it (which I will probably change out and shorten) and I decided that was enough.  Simple and sparkly – love that combination!

sany0060_edited

sany0062

Trust me – this shines like nobody’s business, especially since I found it a location in front of some lights on the tree! While I still want a button tree, this was a fun little compromise to tide me over (still haven’t found my white buttons, lol).

sany0063_edited

My Christmas tree is full…

I still have an entire box of ornaments that didn’t make it onto the tree, and I still keep making more!  Have I mentioned how much I love Christmas and creating for Christmas?  Well I do.  I keep all my Christmas themed supplies separate and love to paw through them and make stuff pretty much year round (I just don’t subject you to them year round, lol).  I usually add a bunch of new each year, however I’m a traditional kinda gal.  To me, it’s just not Christmas if it’s not red and green.  Now this includes almost every variation of red and green including burgundy and evergreen, holly and ivy, and all that.  I draw the line at pink though.  And lime.  This is the second (or is it third?) year where these colors have popped up in sooooo many collections.  I’m waving my white flag at the manufacturers – I’m done!  I have tried to create using those colors and it’s just not Christmas to me!

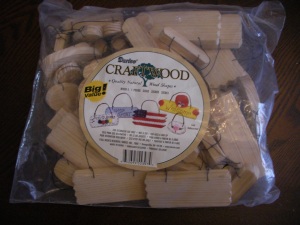
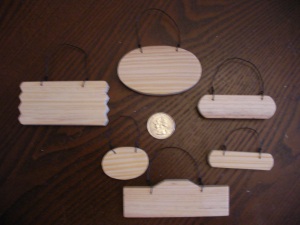
Ok.  Off my soap box, lol!  Just had to get that out of my system.  On to today’s little ornament.  I found this bag of little wooden signs at either Michael’s or Hobby Lobby (sorry, can’t remember which – it’s been a while).   They weren’t meant to be seasonal or anything, just in the unfinished wood section in a bag.  A big, lovely 1 lb. bag.  And that bag was only about $6 (it’s been months, lol, sorry for my indeciseveness)…or $5?  Anyways, it was cheap. With lots and lots of a variety of little wooden signs.

sany0020sany0021

I think I originally saw this and thought of making little magnets, but hadn’t gotten around to it and just came across the bag a couple of weeks ago and the ornament lightbulb went off in my head.  There will be plenty left for magnets later, lol!

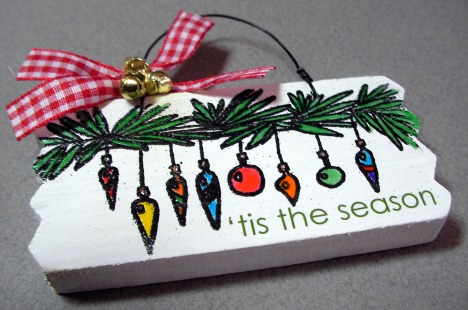
I put several of these wooden ornaments into the upcoming Nov/Dec double issue of Scrapbook News + Review (look for it to drop on the 6th!), but am still playing.  Wood is such a great base to play with – it takes paints, inks, sprays, papers, heat embossing…love it’s versatility.  I base coated a bunch of them in white and have just grabbed one whenever the mood strikes (so I have a little graveyard of unfinished ones drying here and there, lol).  This particular ornament I stamped on.  The stamp is from Wordsworth (now there’s a company I really miss!), heat embossed in black and then colored in using Sakura glaze pens with tiny dabs of Stickles for the ornament tops.  A couple of ribbon scraps and some tiny jingle bells I’ve managed to keep hidden from Michael (who absconds with them then leaves them here and there so the cat absconds with them and I hear them rolling across the floor in the middle of the night…) and a Making Memories rubon.  So about 10 minutes if you don’t include the drying time.  Not bad.  I love little projects like this that can give you a creative “quickie”.  😉

sany0067_edited

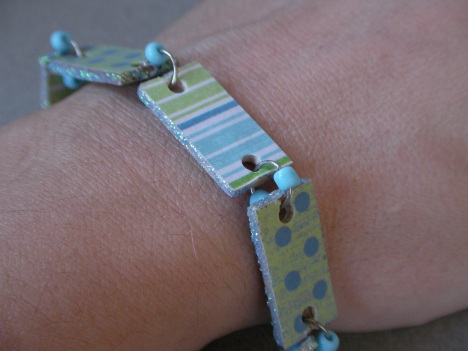
Bluebell Bracelet

Another piece from the Wearables section of the October issue of Scrapbook News + Review.  Just a simple, fun little bracelet using Bo Bunny paper Mod Podged to small wood tiles.  Each tile got edged with Stickles then I used a Crop-A-Dile to get the holes for the jumprings.  I added some coordinating beads to the jumprings because I had to use such large jumprings it just looked empty until those little beads made everything come together!  The magnetic clasp made this much easier to put on/take off.

oct-08-altered-wearables-jenna-franklin-bluebell-bracelet

sany0012

In answer to the question about where to find the tiles, I buy lots and lots of similar items.  Check in any craft store in the unfinished wood section.  They are usually bagged and hanging and come in various shapes, sizes, and mixes – all very inexpensive.  Please note that there will generally be some warped pieces in each bag so just check each piece before you use it and if you need a certain number, grab an extra bag just to be sure you have enough.

As for using Scrabble tiles, yes, you can make a bracelet with them, however I would probably change how you do it.  Since a Crop-A-Dile isn’t going to go through it, you’ll need to use a drill.  Because the tiles are smaller than these (but much thicker), I’d recommend going through from the side rather than the top and stringing them rather than having to use really huge jumprings.

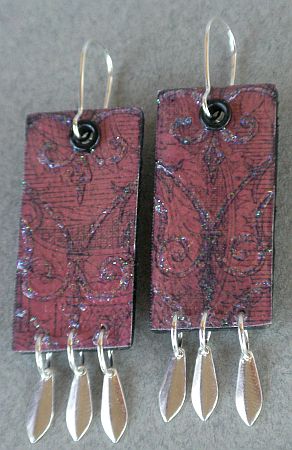
Passion Earrings

Never waste even the smallest scraps of paper!  I don’t even remember what I used this paper from Marah Johnson on originally, but digging through my scraps basket I came across the fact that I had this motif still accessible multiple times.  Some of the background imaging is different, but the main scrolly images were intact.  I had some chipboard blanks (from Creekbank Creations) on the table and they just fit over the area I wanted to work with perfectly so I decided they’d make perfect earrings!  I Mod Podged them on, added a little bit of Stickles (Ranger) and decided that was all they needed.  I had tried a few odds and ends to add to them, but I really liked the design too much to mess with adding rhinestones or anything else I had sitting around, so just left them.  I used a Crop-A-Dile to do a hole in the tops (and added eyelets to strengthen them) and also holes in the bottom to hang some simple silver drops (Fire Mountain Gems) from.

The earrings were in the Wearables section of the October issue of Scrapbook News + Review.

oct-08-altered-wearables-jenna-franklin-passion-earrings

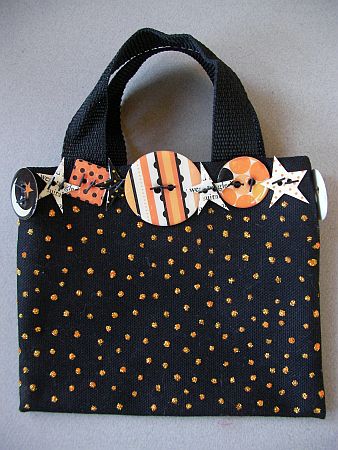
Trick or Treat Purse

This was in the October issue of SNR so I couldn’t share until now. I made it before I realized Michael would be with his dad for Halloween and I wouldn’t have to traipse around the neighborhood this year, lol!  It was meant to hold all the little odds and ends I would want to take with me – camera, chapstick, keys, etc.  It’s just a small canvas bag I got as a two-pack from Hobby Lobby, I believe.  It was easy and fun to put together – I think a similar non-Halloween theme would be a great project for a girly party or sleepover!  I used a pack (about 2/3 of it, I believe) of Making Memories epoxy buttons and simply attached them with the Around the Block Paper Tagger.  You could do this with regular buttons, or any small object that would take the tagger tails.  I then covered the rest of the bag with dots of Stickles.  I put the bag over a vase so that I could Stickle the whole thing at once versus having to wait for one side to dry before starting the other.  Scribbles comes in a glow in the dark I almost used – that could be fun too!

oct-08-altered-wearables-jenna-franklin-trick-or-treat-purse

Happy Halloween!

I have to admit, this one will be strange for me.  It will be my first without taking my son trick-or-treating.  I’ll be taking him over to his dad’s this afternoon and he’ll go out tonight over there in Champaign with his dad.  I’ll definitely be taking some pics beforehand though of my little skeleton!  I was thinking about stopping by a cemetery for some pics – luckily it’s supposed to be a gorgeous day so wish me luck!

I have a couple of Halloween projects left to show you (and a few more that I can’t share until next month so if you want to see them, you’ll need to check them out in the October issue of Scrapbook News + Review!

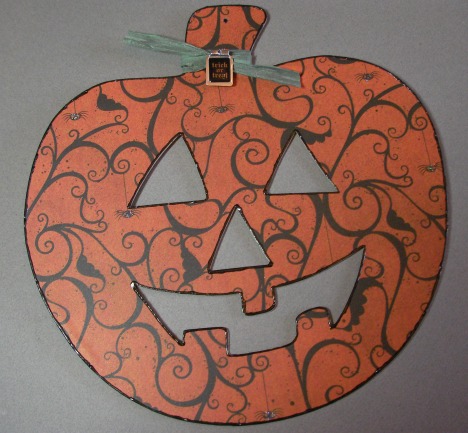
First, meet Jack!  This little wooden Jack-O-lantern was in the $1 bin at Michael’s last year and I got it for my son.  Well, Michael doodled a bit on one side with a marker then got bored and threw it away, lol.  Of course, I rescued it and dug it out this year to do something with it.  It was really quick – I covered it with paper from K & Co (this is where the scraps for yesterday’s earrings came from).  Edged everything with shiny black Scribbles (Duncan) and gave the spiders each a shot of Stickles (Ranger).  Found some old Twistel (think this one was DMD) to tie around the top and added a curled tag from Making Memories.  Then I hit the whole thing with some black gold Glimmer Mists (Tattered Angels) – I did this from a prety good distance to get the coverage the way I wanted it.  Something I want to point out is I LOVE how Glimmer Mists look on the Twistel (which I still have a huge stash of, lol) – definitely will be doing this again!  Usually I paint the back as well but I left Michael’s original artwork intact on this one!  I can’t decide if I want to put this in front of a candle or hang it in a window.  Sorry for the bad pics – I wanted to re-take them outside but just never got around to it.

Off to go photograph my little haunted house now!

Halloween Earrings

This was a fun little project using up the scraps from a larger Halloween piece I’ll hopefully be able to photograph and share tomorrow.  The paper was from K & Co and i just covered small wood tiles front and back with the paper, trying to somewhat center the spiders on the fronts of the earrings.  I then covered front and back with Crackle Accents from Ranger.  After both sides had dried, I applied black Stickles (Ranger) to the edges and used a McGill paper drill to make the holes to attach the jumprings for the earrings.  I used the paper drill rather than a Crop-a-dile because I had forgotten to do this before applying the Crackle Accents and I was afraid of the CAD splitting the crackle.  The paper drill actually drills into your project in a circular motion and I have yet to have it splinter, crack, or in any way mess up anything I’ve used it on, from acrylic to CD’s to paper and chipboard.  It’s a great little tool and a wonderful option for those who might have trouble with the Crop-a-dile because of arthritis or carpal tunnel.  You simply spin the handle around and even the toughest material doesn’t require any strength to turn it.

My First ATC’s

ATC’s are something I’ve eyed for years, meant to try, yet somehow never actually done.  Until now!  Here are my first two.  Both are using pieces cut from a piece of paper from Flair that has vintage Christmas postcards.  I love the images on this paper and think I just might make ALL of them into ATC’s evetually, lol

For this first one, I first used a paint dauber (Ranger) and swirled it onto the base.  Then I attached the postcard image and heat embossed a swirl (HOTP – I smeared the heck out of it) and a couple of snowflakes (also HOTP).  A quick ribbon (American Crafts) to cover a little bit of my embossing faux pas and a brad from Making Memories and I decided it was done.

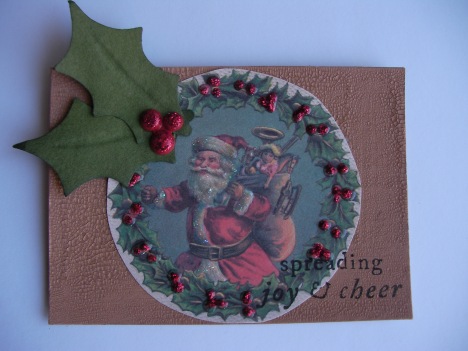
So the next one, I started by painting the base with crackle paint (Ranger).  I cut the circular image out of the postcard paper and added some Stickles (Ranger) over the holly berries.  I stamped the sentiment (HOTP) and then attached some holly leaves with a berry brad (Making Memories) and added a touch of Stickles over those berries as well to make them match the others.

Quick and easy Christmas ornament

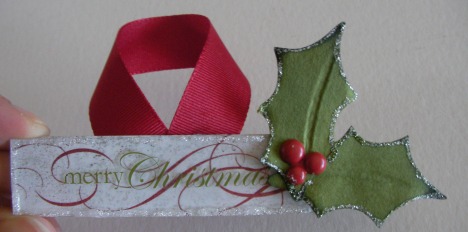
This is a glass tile (found in the general crafts section at either Hobby Lobby or Michael’s – think the brand was Darice, maybe?).  I used crackle accents to attach the paper (Basic Grey) to the back (mainly because I can’t find my Glossy Accents at the moment) and was hoping it might crackle even though it’s sandwiched, but it didn’t.  Anyways, I added a Making Memories rubon on the top, as well as Making Memories holly leaves and berry brad.  Accented everything with Stickles and glued an American Crafts ribbon to the back.  Besides glue drying time, the project took under 10 minutes.  And now I’m addicted, lol!

A simple wooden purse

I’d been wanting to try one of these wooden purses forever and finally sat down and did this one.  All the papers are from American Crafts, the flowers from Prima and the chipboard letter from Zsiage.  I used black Stickles for the flower centers.  The wooden purse itself was a Don Mechanic purse from Michael’s – I actually removed the handle and took the metal pieces off so I could spray paint it (it was originally that light brown).  One thing I learned from this is that you need to let Mod Podge cure for about a week if you’ve done what I did and used it on the inside edges, otherwise the purse won’t open…I also found that rubbing wax over the dried Mod Podge will help alleviate the sticking problem!  Woohoo!  This was in the August issue of Scrapbook News + Review.  Ummm, why K?  Shhhh, mainly just because it was a pretty letter, lol!  I’ve been meaning to give it to the girls next door (Keri and Kayli), but am dreading their mother hating me because they’ll fight over it…

More acrylic pendants

Yea, I’m getting a little addicted to these!  Kinda cool how many you can get out of a single extra mini book page and some paper scraps!  These two were in the September issue of SNR and I have to admit, the first one is probably my favorite yet.  And it’s all the paper – I just love letting the paper BE the design and just add some sparkle!

Supply list (top):

Patterned paper – Daisy D’s
Acrylic – Clear Scraps
Glossy Accents – Ranger
Stickles – Ranger
Rhinestones – Westrim
Ribbon – American Crafts

Supply list (bottom):

Patterned paper – Zsiage
Bead – Fire Mountain Gems
Ribbon – American Crafts
Stamps – Hot Off the Press (swirl) and KI Memories (word)
Embossing powder – Stampendous
Acrylic: Clear Scraps
Inks: Ranger and Tsukineko
Glossy Accents: Ranger